
Deep linking is a technique that opens different start screens based on the parameter values passed in the URL of the application.
Scenario
We have a “Leave Request” application where a user can submit a leave request. The approver authority receives an email with a link to the application to see the details and approve the request. When the approver opens the application, the user request details are opened in the “EditForm”.
1. Create an application
We created an application with two screens.
The first screen has a leave request form with the default “DisplayMode” set to “New”.

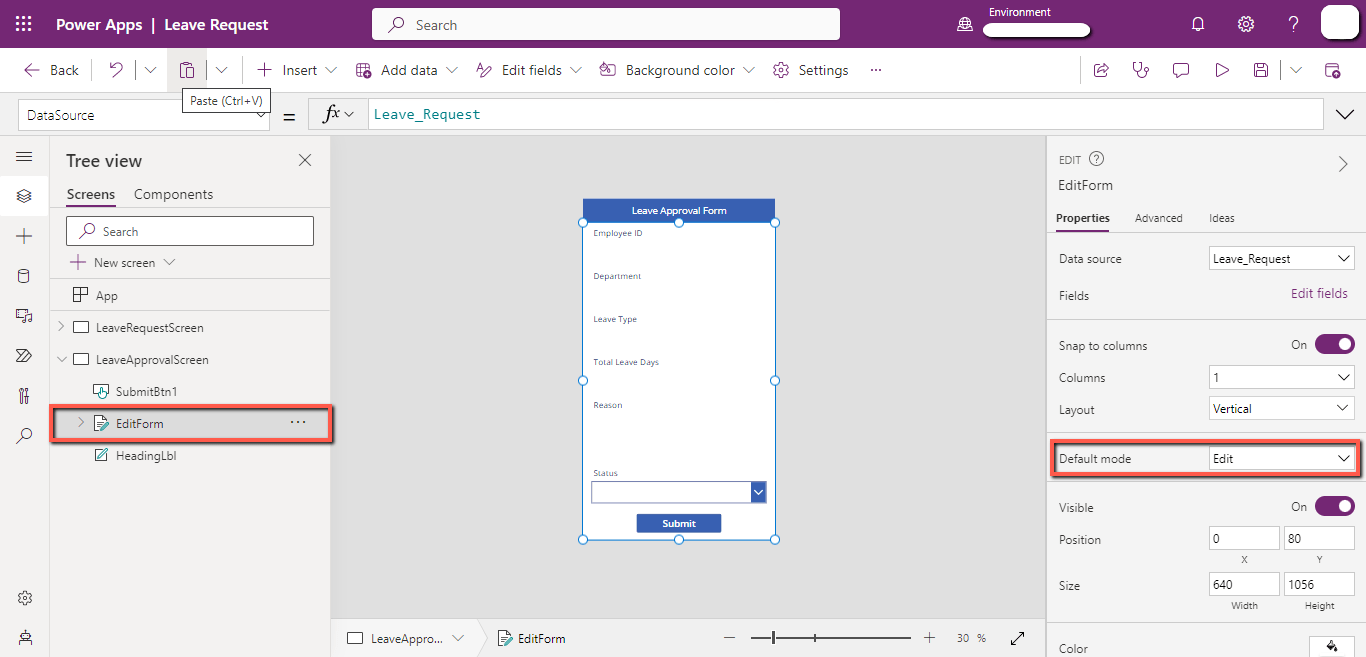
The second screen has the same form, but it has the default “DisplayMode” set to “Edit”.
2. StartScreen/OnStart
PowerApps introduced the “StartScreen” function where we can write the name of a specific screen. By default, the app will consider and open the first screen as the start screen.
Now we want to open “LeaveRequestScreen” when a user wants to submit a leave request and open the “LeaveApprovalScreen” when the approver opens the application.
We wrote the following code on the “StartScreen” property of the application.
Switch(
Param(“Screen”),
“Approver”,
LeaveApprovalScreen,
“Requester”,
LeaveRequestScreen,
LeaveRequestScreen
)
If the “Screen” parameter in the URL has a value equal to “Approver”, the user will be redirected to the “LeaveApprovalScreen” and if the “Screen” parameter has a value equal to “Requester”, the user will be redirected to the “LeaveRequestScreen”.

Now for the “LeaveApprovalScreen”, when the approver opens the application, we want to pass the record to populate in the “EditForm”.
To find the record, we wrote the following code on the “OnStart” property of the application.
If(
!IsBlank(Param(“ID”)),
Set(
varItem,
LookUp(
Leave_Request,
ID = Value(Param(“ID”))
)
)
)
This code will get the “ID” from the URL, find that record from the data source and store it in the “varItem” variable.

Now select the “EditForm”, select the “Item” property, and pass the “varItem” variable.

The app is ready, now we will create the flow.
3. Create Power Automate flow
We created an approval flow from where the approver can see the request details in the “EditForm” of the application.

In the URL of the application, we passed the value to the parameter “Screen” equal to “Approver” and “ID” equal to the “ID” of the record coming from the trigger action.

The flow is ready to work.
4. Test the app
Open the app and submit a new leave request.

The approver gets an email as follows.

When the user clicks on the link, the app opens with the details of the request.
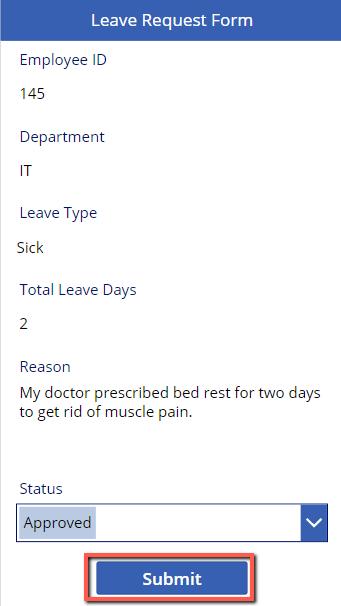
The deep linking worked as the approver is landing directly on the “LeaveApprovalScreen” and other users are landing directly on the “LeaveRequestScreen”.