PowerApps components are reusable building blocks. Users can create a component once and use it across multiple screens. In this blog we will build a simple header component.
Suppose we have an app with multiple screens. Each of the screens will require a Header. One of the options will be to go to every screen and create a header. The other option will be to use components.
1. Create a new canvas app
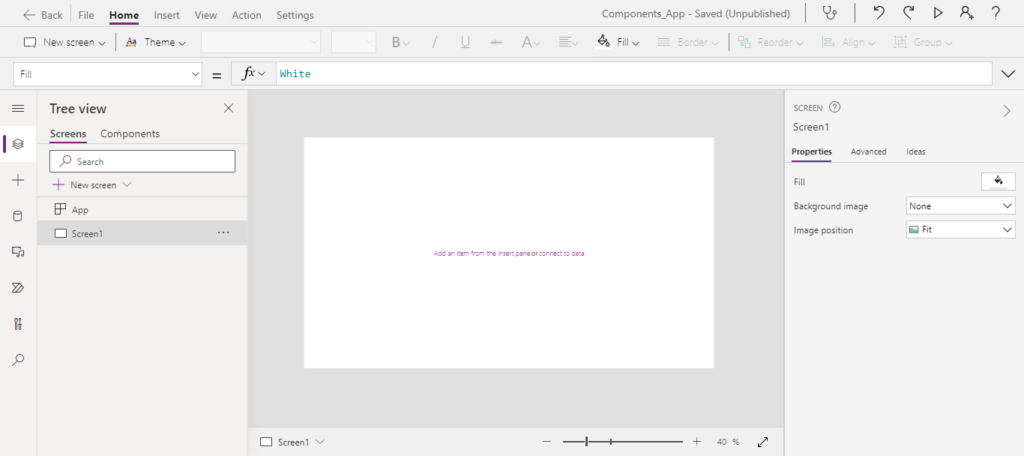
Open the PowerApps studio and create a new “Canvas” application.
You will see the following screen.
2. Create a new component
- Click on the “Components” tab.
- Click on the “New component”.
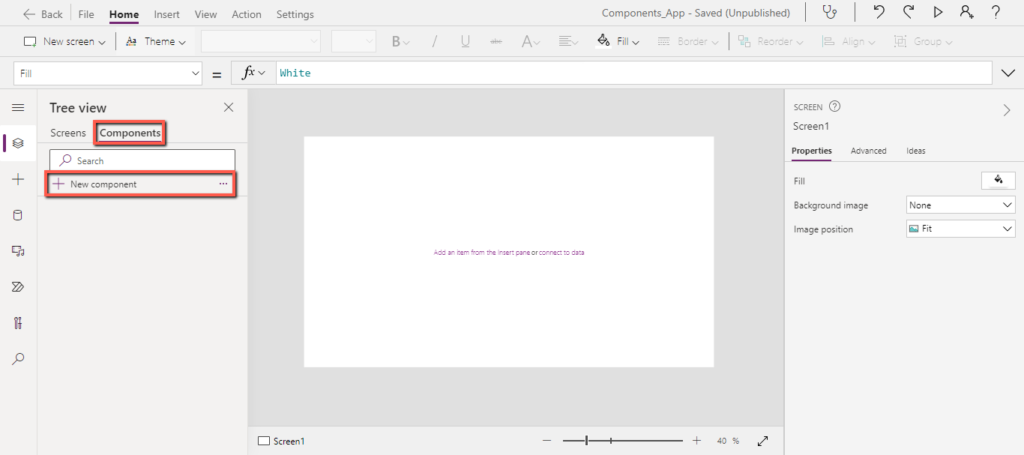
A new component will be created like the one below.
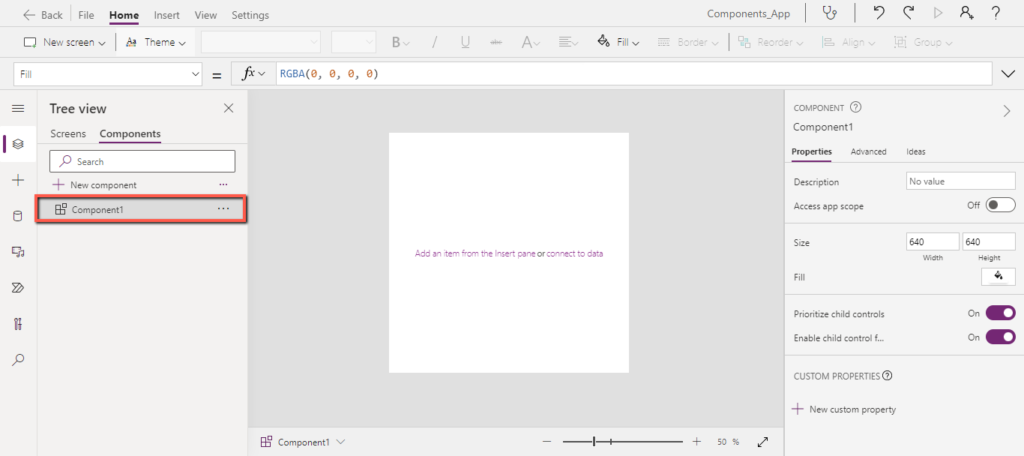
- Rename this component to the “HeaderComponent”.
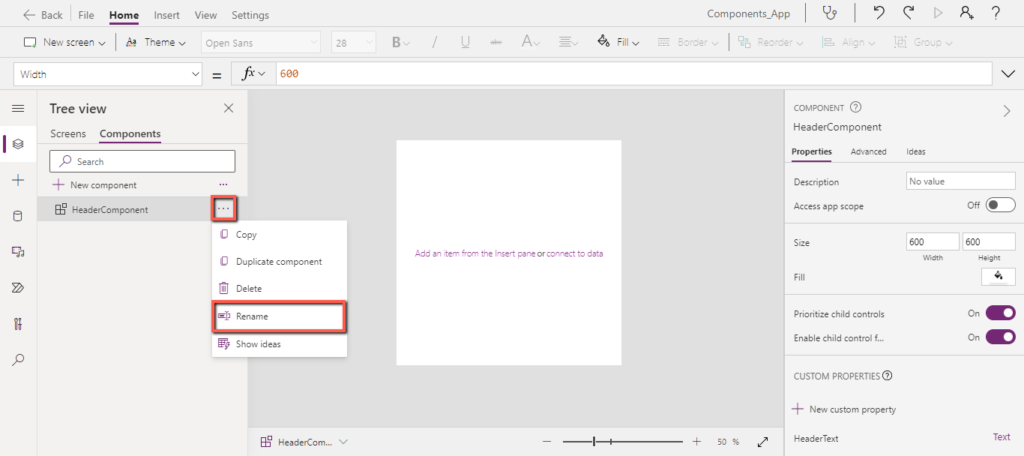
3. Design the component
We will need to add styling and design to the “HeaderComponent”.
Set height and width:
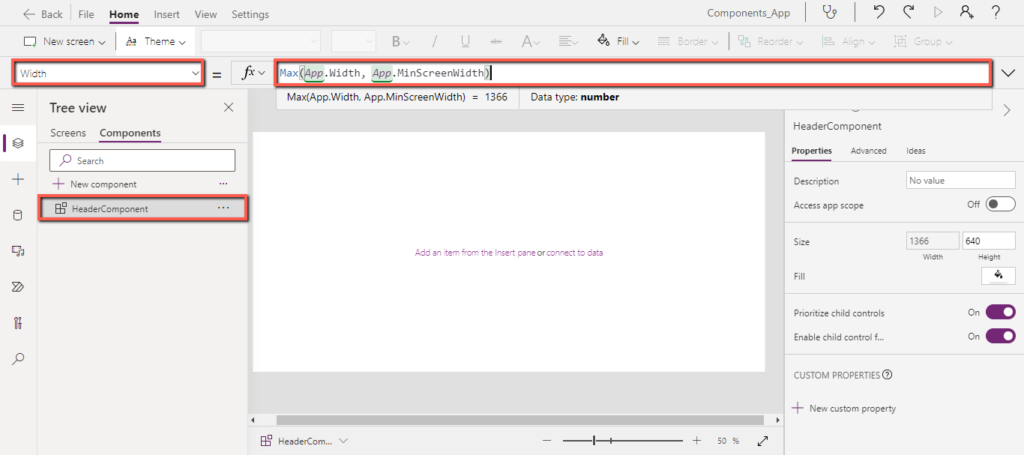
- Select the “Width” property of the component, copy the code given below and paste it in the top bar.
Code:
Max(App.Width, App.MinScreenWidth)
This code will set the width of the component to equal the width of the screen.
You can change the width and height according to your requirements.
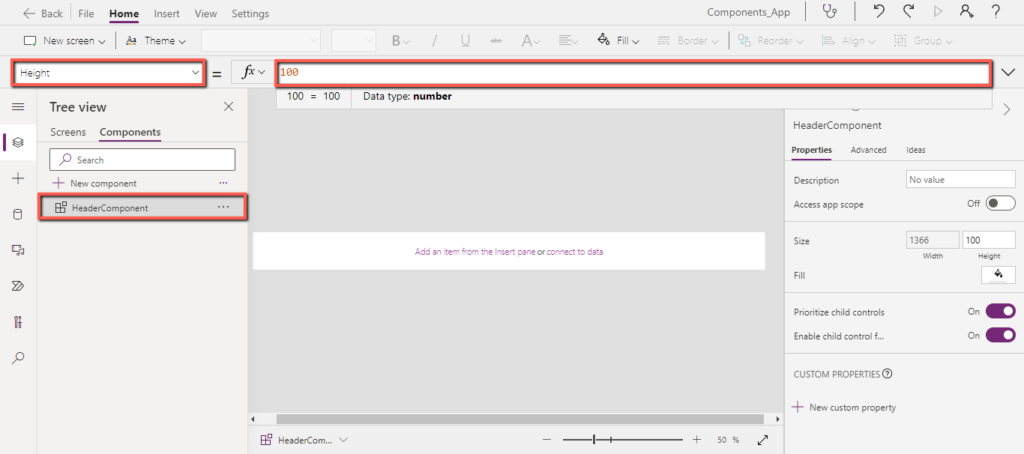
- Select the “Height” property of the component and set it to “100”.
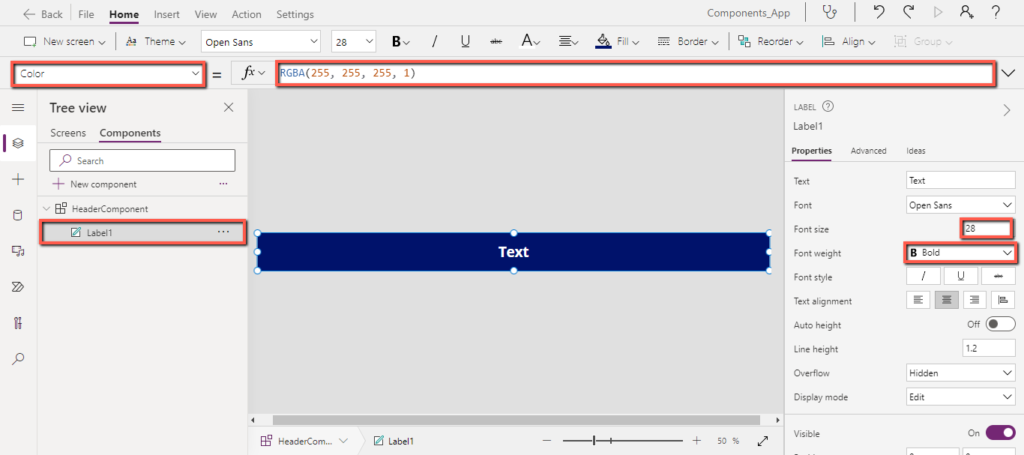
- Add a “Label” and set its dimensions equal to the component’s dimensions.
- Fill the “Label” with color.
- Adjust the “font-size” and “font alignment”.
4. Creating component properties
Every PowerApps control has a set of properties e.g., a button has “Fill”, “OnSelect” etc. Similarly, we can create properties for our created components. These properties can be used to give input to the component and get output from it.
Let’s see how we can display a text in the component using “Text” property.
In this step, we will add a custom property to our newly created “HeaderComponent”.
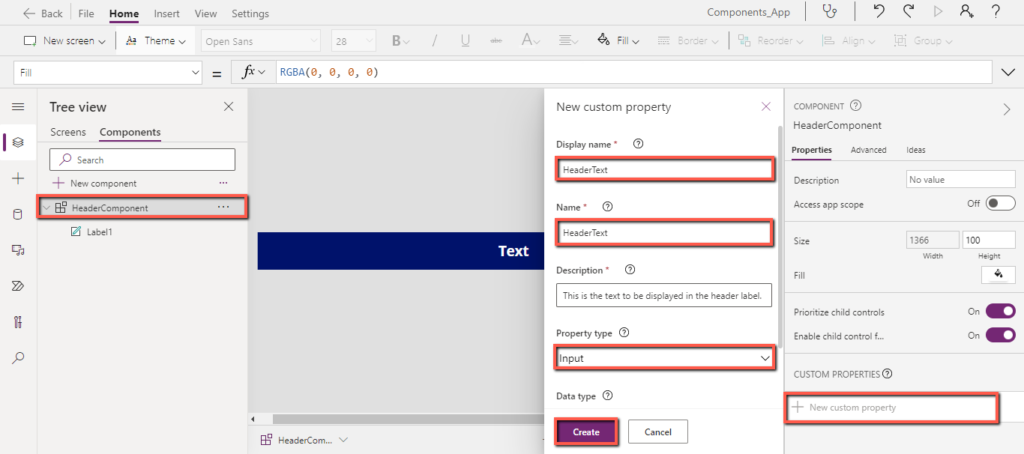
- Select the “HeaderComponent” and click on the “New custom property”.
- Add the “DisplayName”, “Name”, and “Description” in their respective fields.
- Set the “Property Type” to “Input”.
- Click on the “Create” button.
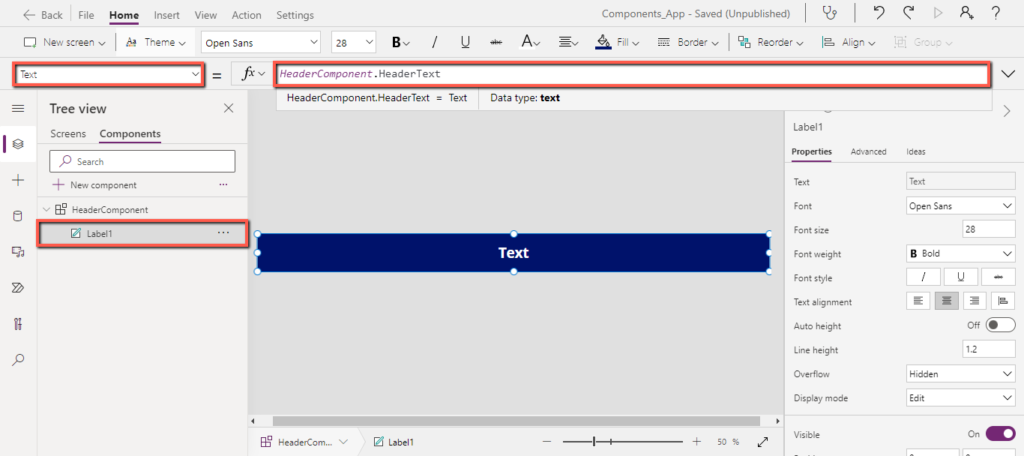
- Select the “Label” and set its “Text” property to “HeaderComponent.HeaderText”.
5. Test the component
Let’s test the component and the “HeaderText” property that we have added.
- Open the “WelcomeScreen” from the “Screens” tab.
- Click on the “Insert” tab.
- Click on the “Custom” drop-down.
- Click on the “HeaderComponent”.
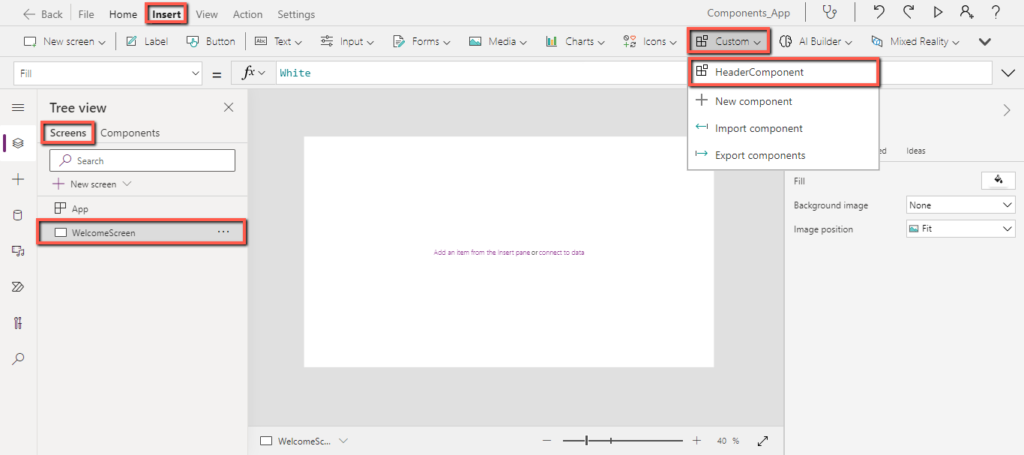
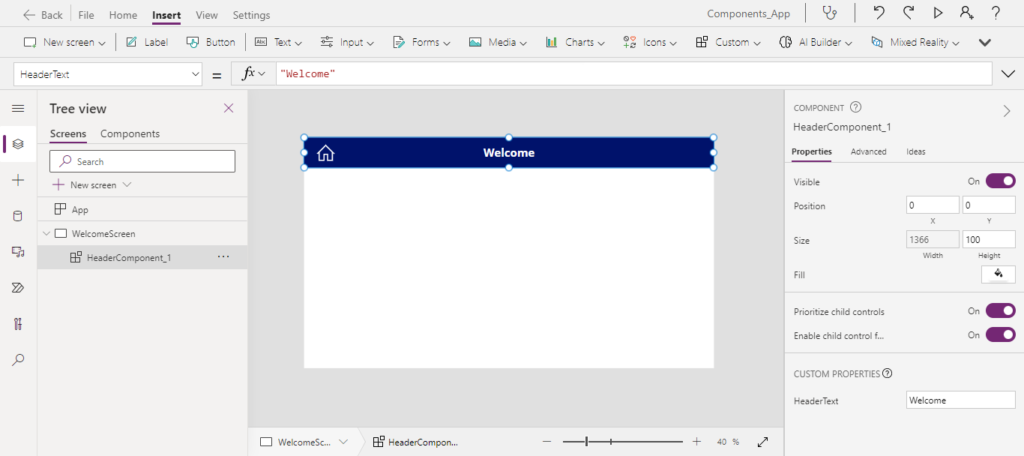
The “HeaderComponent” will be added to the screen.
To change the header text, select the “HeaderText” property of the “HeaderComponent” and write the desired text in it.
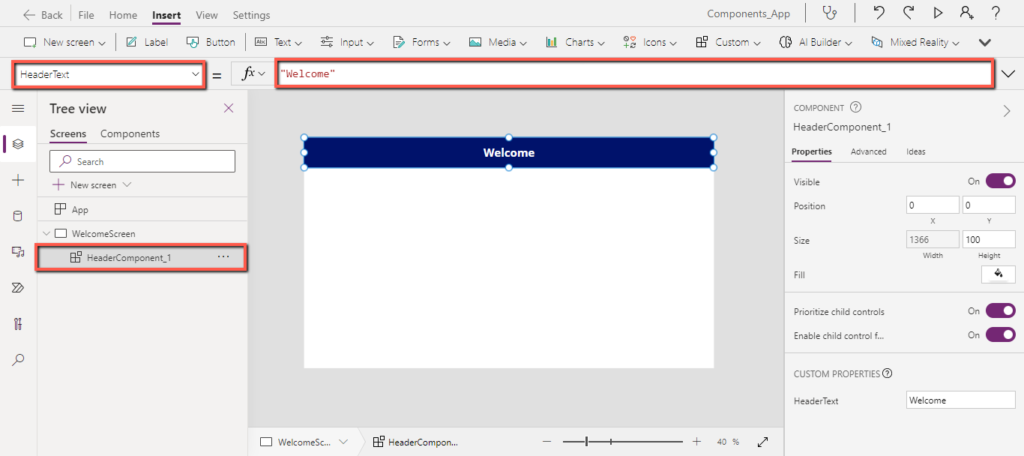
Similarly, you can add “HeaderComponent” to multiple screens and edit its “HeaderText” according to the requirements.
6. Editing the component
If you want to change anything in “HeaderComponent”, just go back to the “Components”, edit the “HeaderComponent” and the component will be updated on all the screens at once. You do not need to update the component for each screen.
Let’s add a “Home” icon in the “HeaderComponent” from “Icons” as shown below.
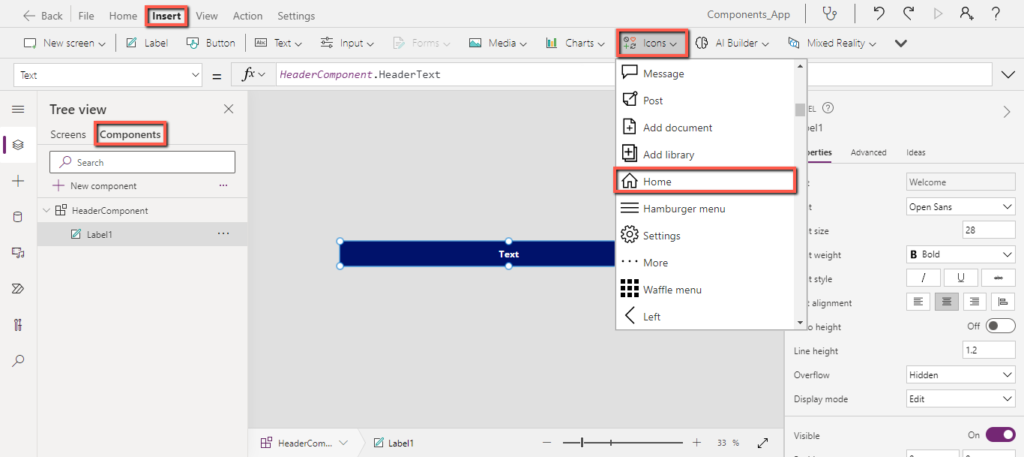
Now check “WelcomeScreen”, the “HeaderComponent” will be updated automatically.
Conclusion
PowerApps components are reusable and easy to maintain. Components help you to minimize the number of controls used and thus optimize the performance of the application. You can also set custom input and output properties of the component.
