PowerApps users can now create PowerApps application’s UI using pictures.
This feature will significantly reduce the time users spend on making the UI of the applications.
Scenario
We want to create a student registration form in PowerApps. We will design the UI on a white page and use the page image to create an application.
Step1. Create a form
Create a form on any software. You can also design the form using paper and pen. Just make sure you are using a light background otherwise the image will not convert properly.
We will be using the following form layout.

Step2. Create a new application
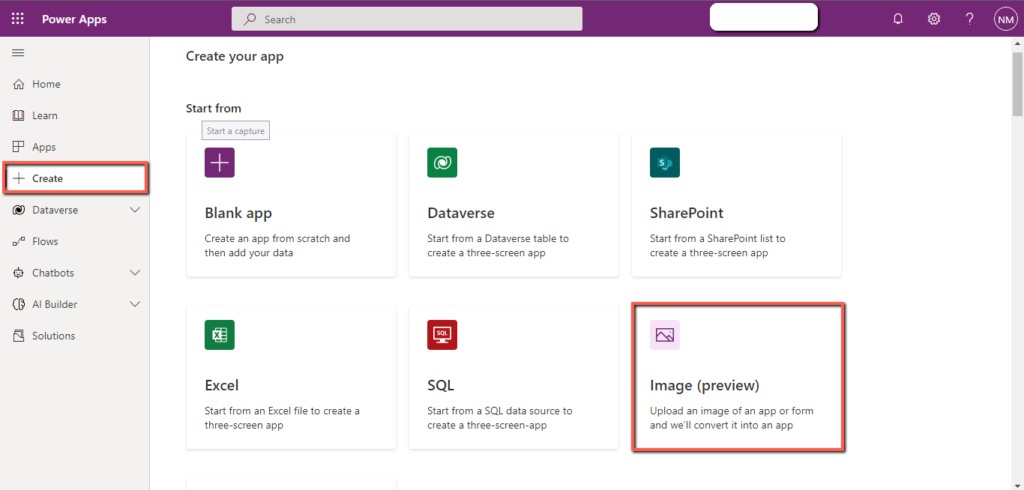
- Go to the PowerApps studio.
- Click on the “Create” tab.
- Scroll down the screen and click on the “Image (preview)” card.
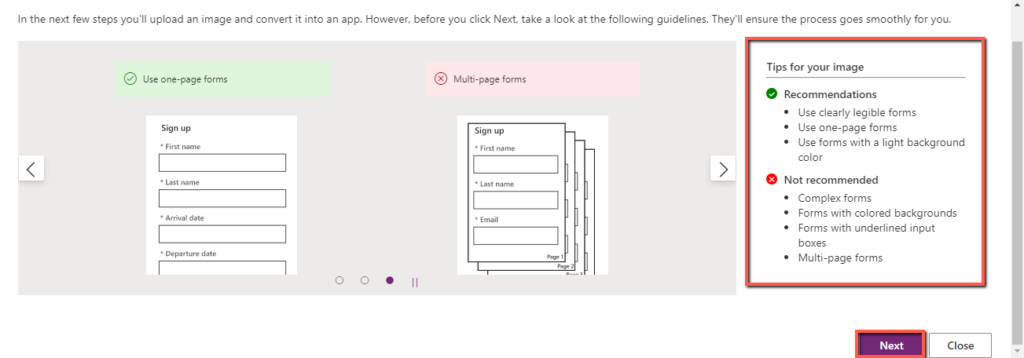
Read the instructions carefully and click on the “Next” button.
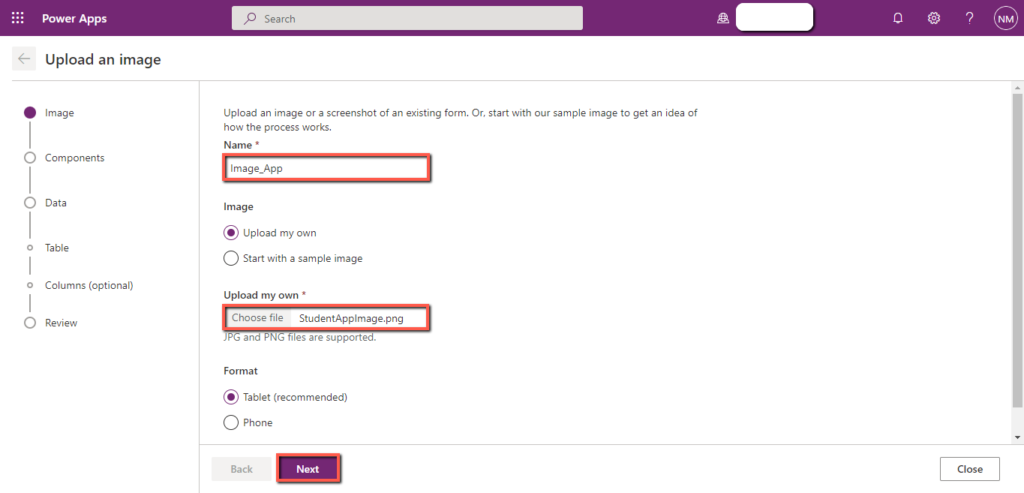
Write the “Name” of the application, upload the “Image” of the form, and click on the “Next” button.
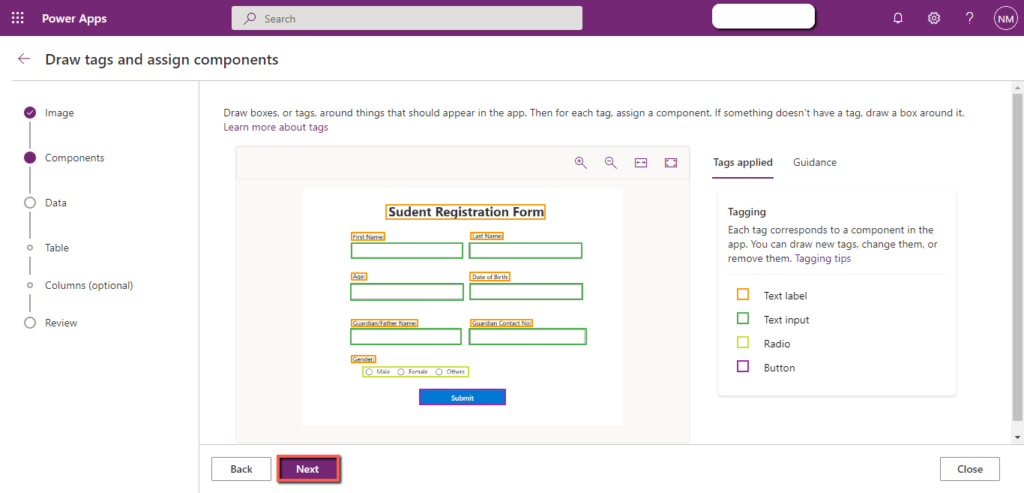
It will automatically detect all the components used in the form.
Click on the “Next” button.
You will be asked to “Create a new data verse table”, click on the “Skip this for now” card and click on the “Next” button.
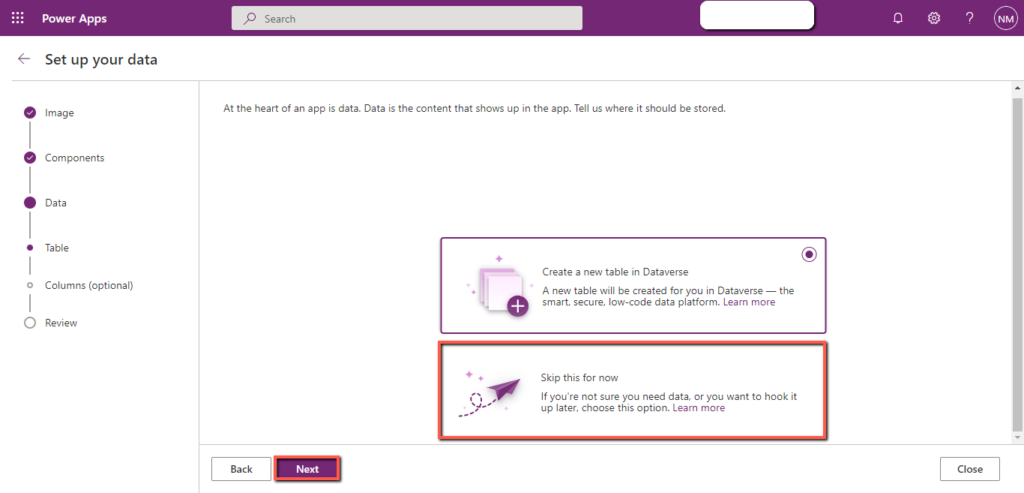
It will take some time. Our application’s UI is now created.

We need to adjust the “font-weight”, and “font-size” and remove the “Default” text of the “Text Input” fields.
The app is ready with the desired output screen.

The following image files are supported
The following image extensions are supported for creating Power App from an image.
- jpg
- jpeg
- gif
- png
- bmp
- tif
- tiff
- svg
Limitations
- This feature only works for images with light background, if the background of the image is dark then the image may not convert properly.
- This feature does not support complex forms, only simple forms divided into columns are supported.
Conclusion
Users can create PowerApps application UI using images. We converted a form image into a PowerApps form. This feature also has some limitations, it does not support complex forms and forms having a dark color background.
