
Do you know, you can set user permissions/roles in PowerApps using Azure Active Directory groups? No need to maintain a list of user roles in SharePoint or any other data source. In this blog, we will use Azure AD connector with PowerApps to set permissions based on the user membership of different groups and add or remove users from the groups.
Scenario
We have a Power App with two user’s admin and a normal user. The people existing in the “PowerCloudTechnologies” Azure group will see the admin-level options in the dashboard while people from the “Logistics” group will see normal user options in the application dashboard.
1. Get Groups IDs
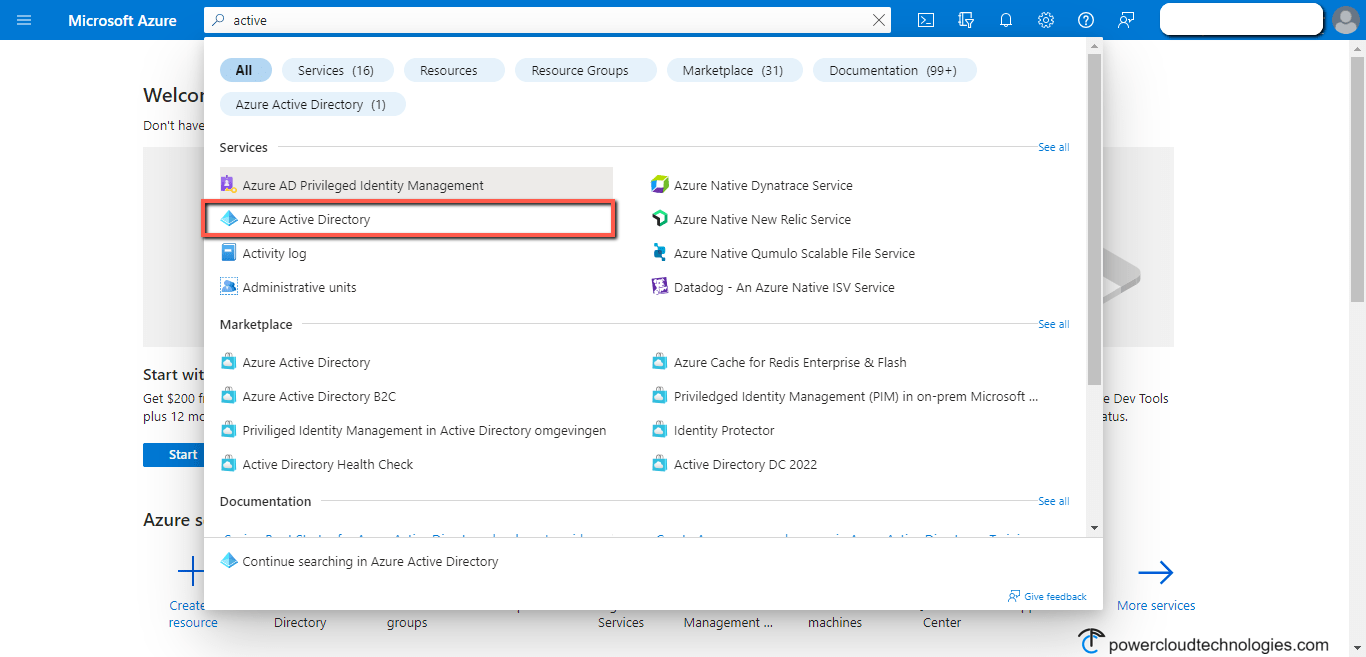
Go to the Azure portal.

Search and select “Azure active directory”.
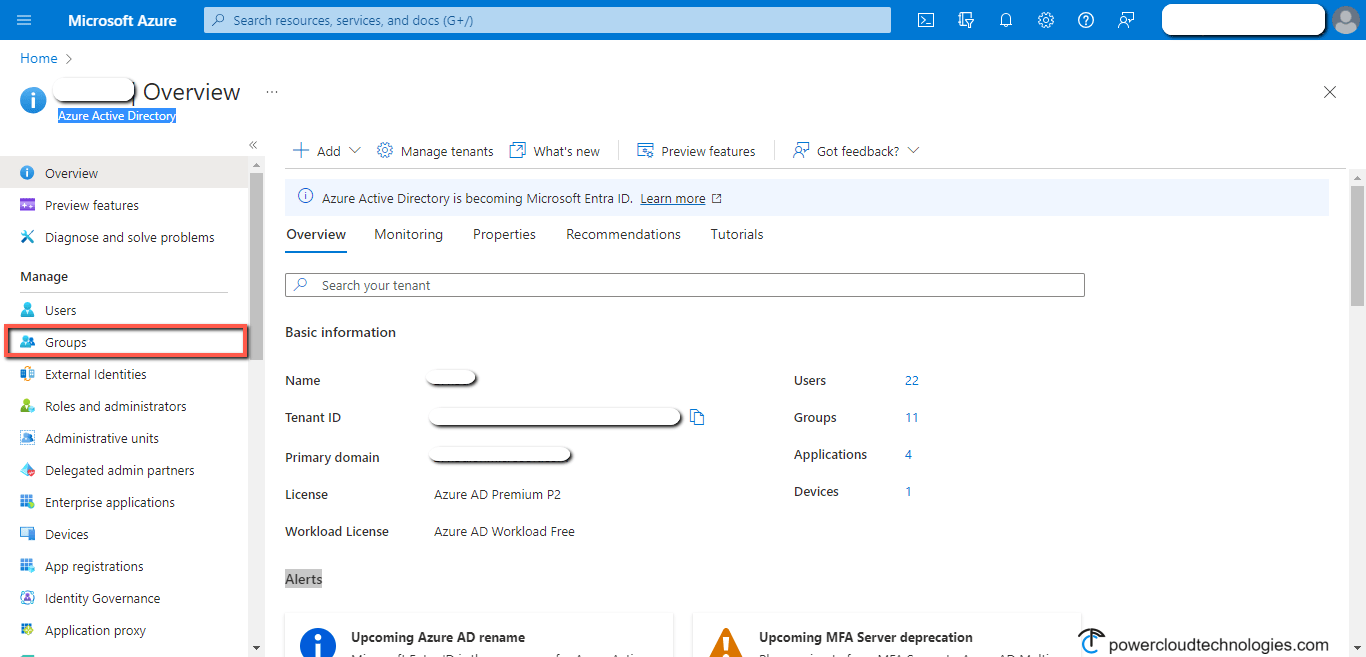
From the left bar, select the “Groups”.
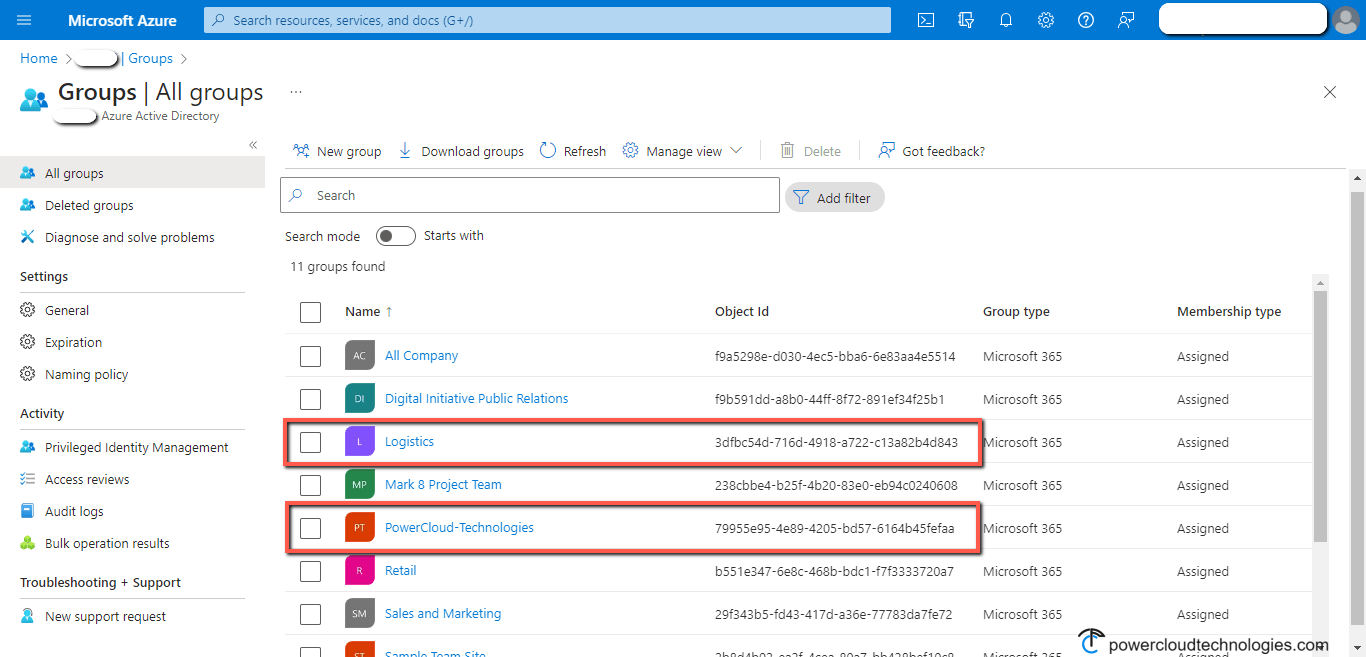
Copy and save the “Object Id” of the groups to use in the next step.
2. Do the Configurations in the PowerApps
Open the PowerApps Canvas application.
Connect the “Azure AD” connector.

Select the “OnStart” property of the app, and copy and paste the following code into the top bar.
Code:
If(
User().Email in AzureAD.GetGroupMembers(“79955e95-4e89-4205-bd57-6164b45fefaa”).value.mail,
Set(
varAdmin,
true
),
User().Email in AzureAD.GetGroupMembers(“3dfbc54d-716d-4918-a722-c13a82b4d843”).value.mail,
Set(
varUser,
true
)
)
This code checks if the user email exists in the “PowerCloudTechnologies” group. It sets the “varAdmin” variable as true. If the user email exists in the “Logistics” group, it sets the “varUser” variable as true.

Set the “Visible” property of the admin option controls to “varAdmin”.

Set the “Visible” property of the user option controls to “varUser”.

The app is ready with user permissions in place.
3. Test the App
Play the app.
The user in the “PowerCloudTechnologies” group sees the following dashboard screen.

The user in the “Logistics” group sees the following dashboard screen.

4. Adding or Removing a User from Group
Now we will enable the administrator to add or remove the users from the groups.
Add a “ComboBox”, rename it to “GroupsCombo”, select its “Items” property, and write the names of the groups.

Select the “OnChange” property of the “GroupsCombo”, and copy and paste the following code into the top bar.
Code:
Set(
varGroupID,
If(
GroupsCombo.Selected.Value = “Logistics”,
“79955e95-4e89-4205-bd57-6164b45fefaa”, //GroupID
GroupsCombo.Selected.Value = “PowerCloudTechnologies”,
“3dfbc54d-716d-4918-a722-c13a82b4d843” //GroupID
)
)
This code stores the selected group ID into the “varGroupID” variable.

Add another “ComboBox”, rename it to “UsersCombo”, select the “Items” property, and copy and paste the following code into the top bar.
Code:
Office365Users.SearchUser(
{
searchTerm: UsersCombo.SearchText,
top: 10
}
)
This code adds all tenant users to the “UsersCombo”.

Add a “Blank vertical gallery”, select the “Items” property, and copy and paste the following code into the top bar.
Code:
If(
!IsBlank(varGroupID) && varUpdate,
AzureAD.GetGroupMembers(varGroupID).value
)
This code shows the existing users of the selected group in the gallery.
Note: Ignore the “varUpdate” variable error, we will initialize this in the next step.

Add two “Button” controls.
Select the “OnSelect” property of the “Add” button, copy, and paste the following code into the top bar.
Code:
Set(
varUserID,
AzureAD.GetUser(UsersCombo.Selected.Mail).id
);
AzureAD.AddUserToGroup(
varGroupID,
varUserID
);
UpdateContext({varUpdate: false});
UpdateContext({varUpdate: true})
This code gets the user ID from Azure, stores the ID in the “varUserID” variable, and then passes this ID to the Azure connector to add the user to the group.

Select the “OnSelect” property of the “Remove” button, copy, and paste the following code into the top bar.
Code:
Set(
varUserID,
AzureAD.GetUser(UsersCombo.Selected.Mail).id
);
AzureAD.RemoveMemberFromGroup(
varGroupID,
varUserID
);
UpdateContext({varUpdate: false});
UpdateContext({varUpdate: true})
This code gets the user ID from Azure, stores the ID in the “varUserID” variable, and then passes this ID to the Azure connector to remove the user from the group.

5. Test the App
Play the app, select a group and a user.

Click on the “Add” button.

The user is added to the group.

Select the same user and click on the “Remove” button. The user is removed from the group.

Conclusion
You can use Azure AD connector to get group members and based on the group membership you can set permissions in PowerApps. You can also directly add or remove the user from the group using the user ID from Azure and Group ID.