
We know that files can be uploaded in SharePoint Library using Power Automate, but do you know we can also do it without using Power Automate? In this blog, we will send HTTP calls to upload documents directly from the PowerApps using Graph API and Office365Groups connector.
1. Get site details from Graph API
We need to find the “Id” of the SharePoint site and “Id” of the “Document Library”.
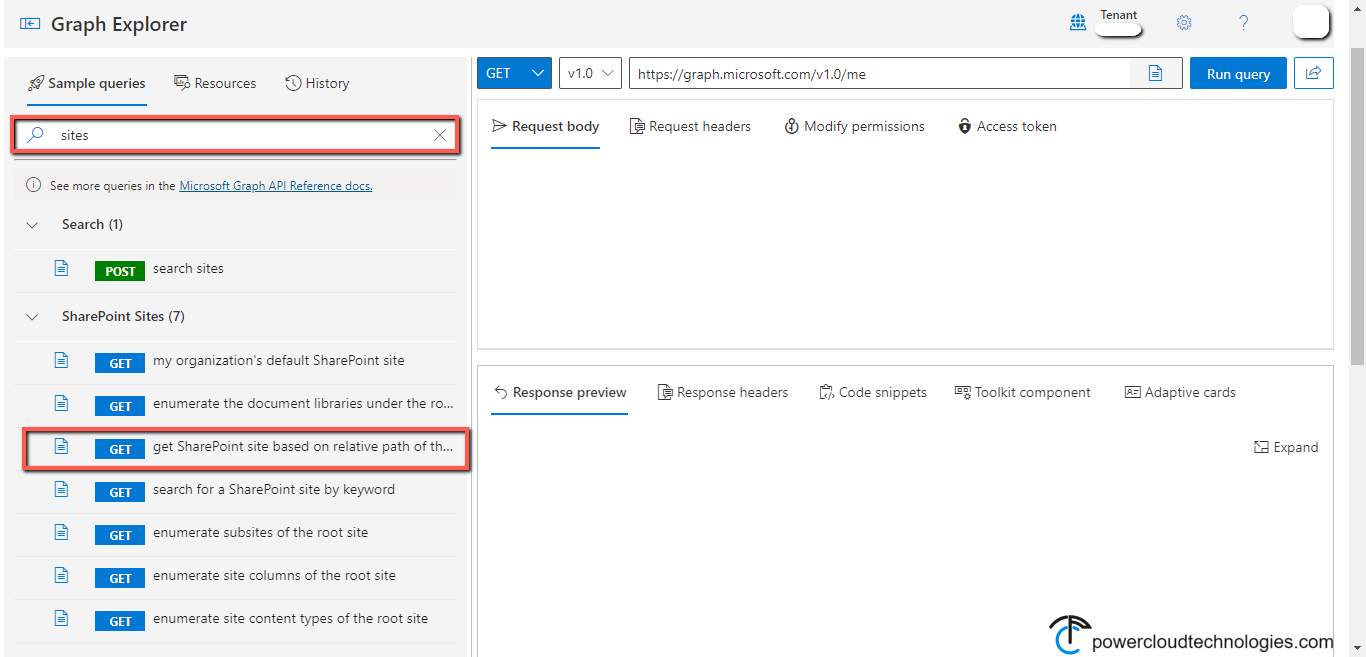
Open the Graph Explorer and sign in using your Microsoft account.

Search “Sites”, in SharePoint sites select the “Get SharePoint site based on relative path of the site” query.
The following query is loaded.
General Query
https://graph.microsoft.com/v1.0/sites/{host-name}:/{server-relative-path}
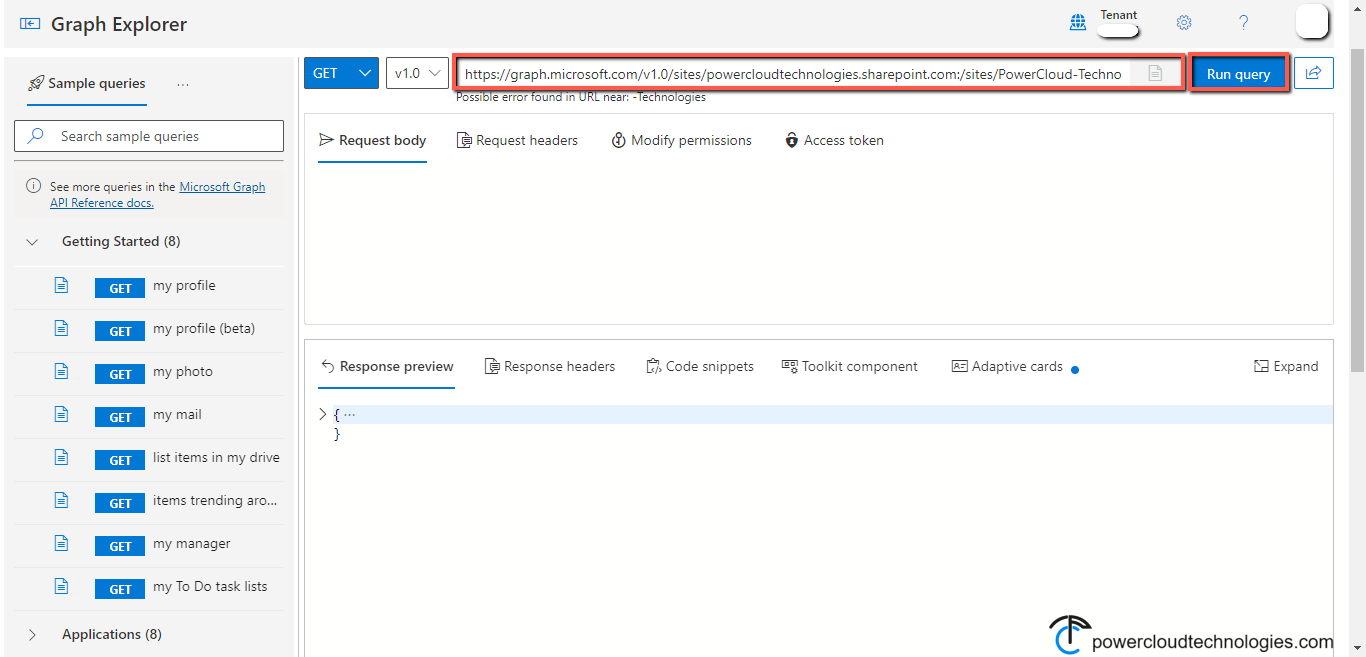
Paste your “host-name” and “server-relative-path”, your query should look as follows.
Updated Query
https://graph.microsoft.com/v1.0/sites/powercloudtechnologies.sharepoint.com:/sites/PowerCloud-Technologies
Run the updated query.
Copy and save the “id” highlighted in the image below.
Note: Only copy and save the highlighted part of the id separated by commas.

In the following query, put the “id” saved in the last step and run it.
Query
https://graph.microsoft.com/v1.0/sites/put-id-here/drives

Find the name of the desired document library, copy, and save the “id”.

Paste the “site id” and “Document library id” in the following query and run it.
Query
https://graph.microsoft.com/v1.0/sites/site-id/drives/document-library-id

Received a response of Ok – 200 means the path is correct. Now we can move to the next step.
2. Create an App
Create a “Canvas” application.

Connect the “SharePoint Library”.

We need an Office365Groups connector to send the “HTTP” request.
Connect the “Office365Groups” connector.

Add an “Attachment” control (add a form connected to a list, copy the attachment control, and delete the form).
Add a “Button” control.

Select the “OnSelect” property of the “Button”, copy the code given below, and paste it into the top bar.
Code:
ForAll(
Attachments.Attachments,
Office365Groups.HttpRequest(
“https://graph.microsoft.com/v1.0/sites/e453f3 -66ef13c1edc1/drives/b!eowJ5Pb1ZaUrQVk_/root:/”&ThisRecord.Name&”:/content”,
“PUT”,
ThisRecord.Value
)
)
This code sends an HTTP request of type “PUT” to the specified URL with the “file name” and “file content” as parameters.
Note: The highlighted URL is the query that we ran in the last step.

The app is ready, Save it.
3. Test the App
Play the app, attach some files, and click on the “Upload” button.

All three files are uploaded.

Conclusion
You can upload files into the SharePoint library from PowerApps without using the Power Automate flow. Just get the library details using Microsoft Graph Explorer and send HTTP request from PowerApps to upload files directly into the SharePoint library.