In this blog, our goal is to activate a Power Automate flow when a user completes a form within the SPFx web part.
1. Create a Power Automate flow
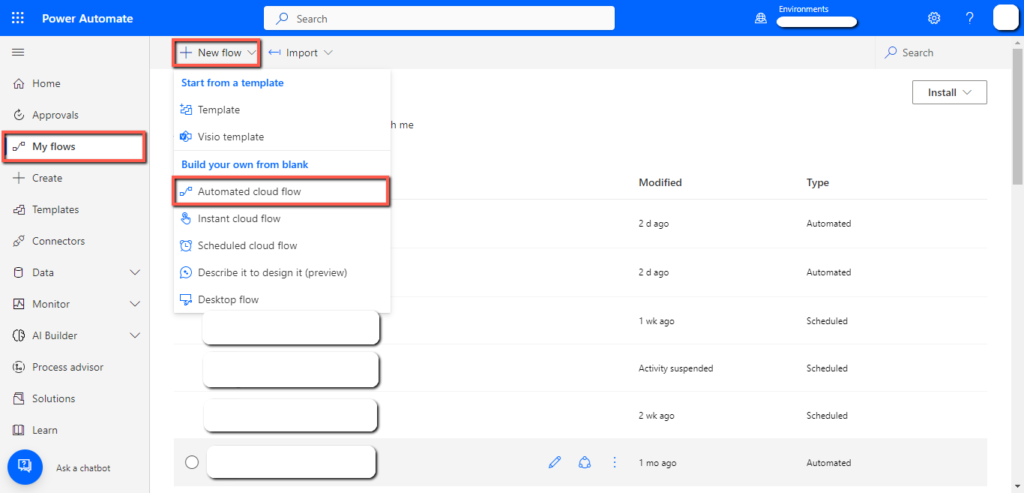
Go to Power Automate studio.
Create an “Automated cloud flow”.
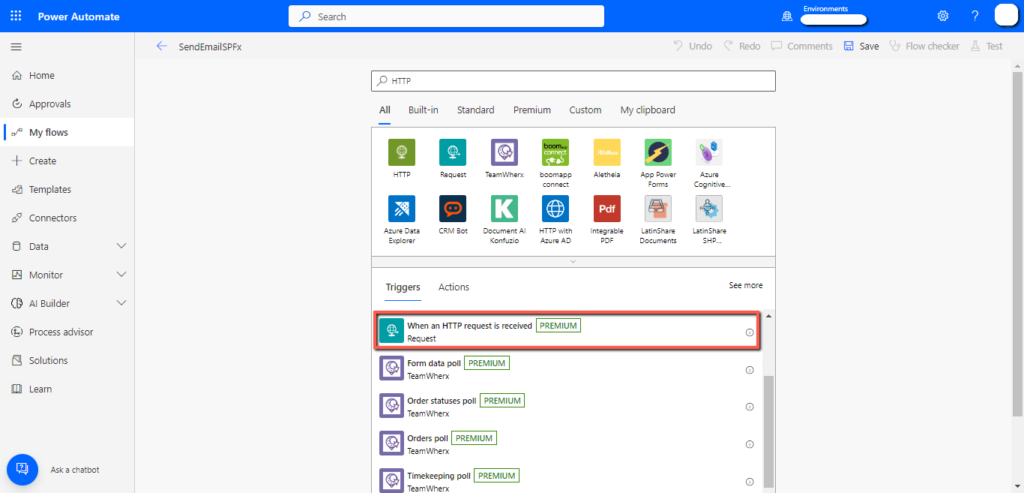
Add a “When an HTTP request is received” trigger.
Paste the following “Schema” in it.
{
“type”: “object”,
“properties”: {
“emailaddress”: {
“type”: “string”
},
“emailSubject”: {
“type”: “string”
},
“emailBody”: {
“type”: “string”
}
}
}
This “Schema” defines three properties “emailaddress”, “emailSubject”, and “emailBody” of type string. This schema provides a clear understanding of the expected data type.
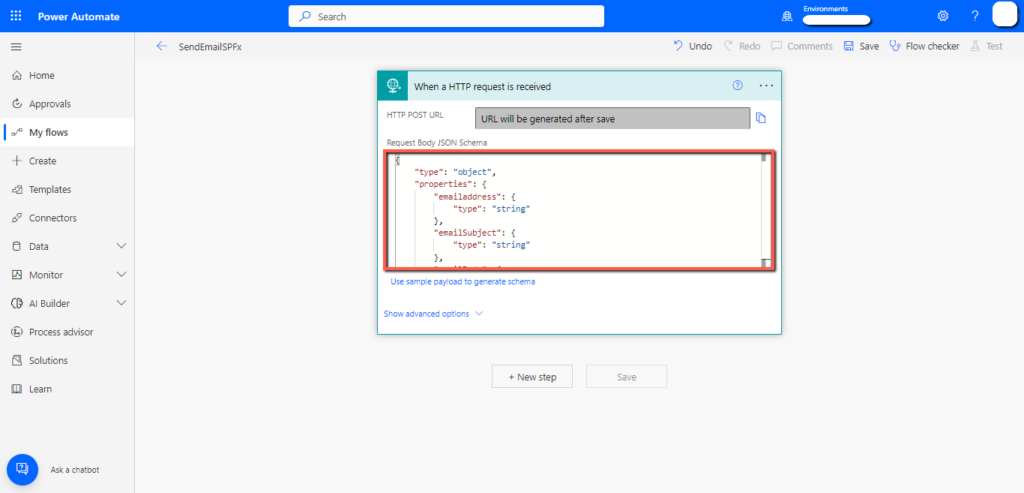
When you have created the schema.
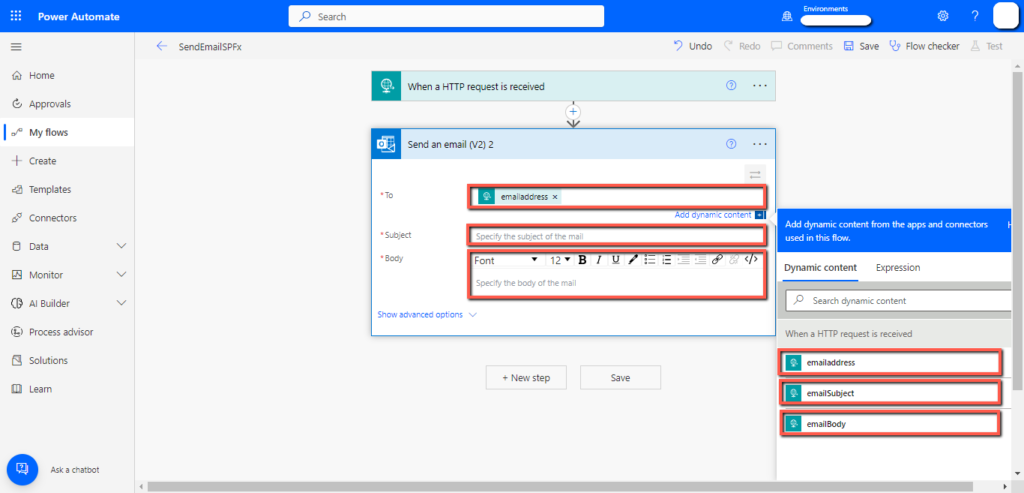
Add a “Send an email V2” action.
From the dynamic content, add the “Email”, “Subject” and the “Body” of the email.
Add a “Response” action and write “200” in the “Status code” which means that the request was successful. From the dynamic content add “Body” into the “Body” field.
This action will return the “Status code” and the “Body” as a response to the request made from the SPFx web part.
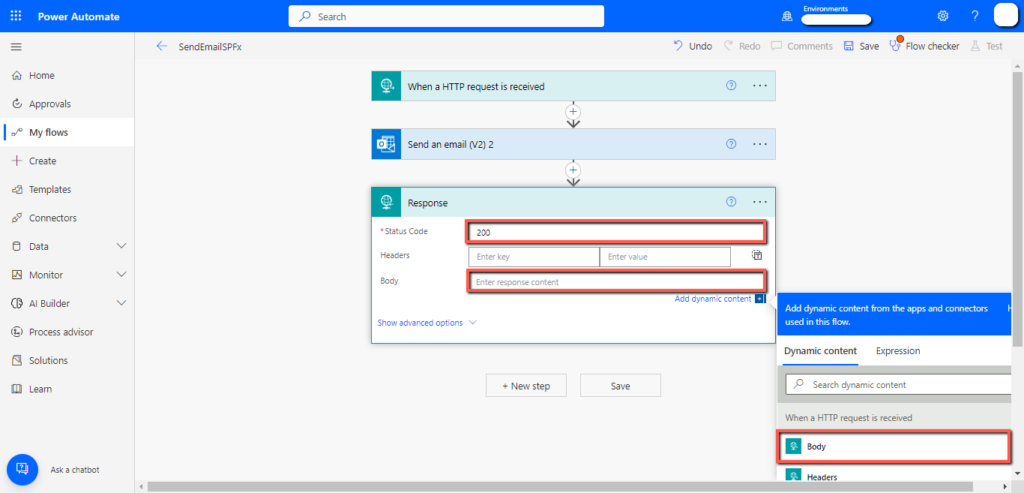
The flow is ready, “Save” it.
2. Create SPFx Web Part
Create a new SPFx web part with “No Framework”.
Note: My solution name is “SendEmailSPFx”, make sure to replace it with your solution name.
Open the “src” folder in your web part solution.
Replace the “YourSolutionNameWebPart.ts” file code with the following code.
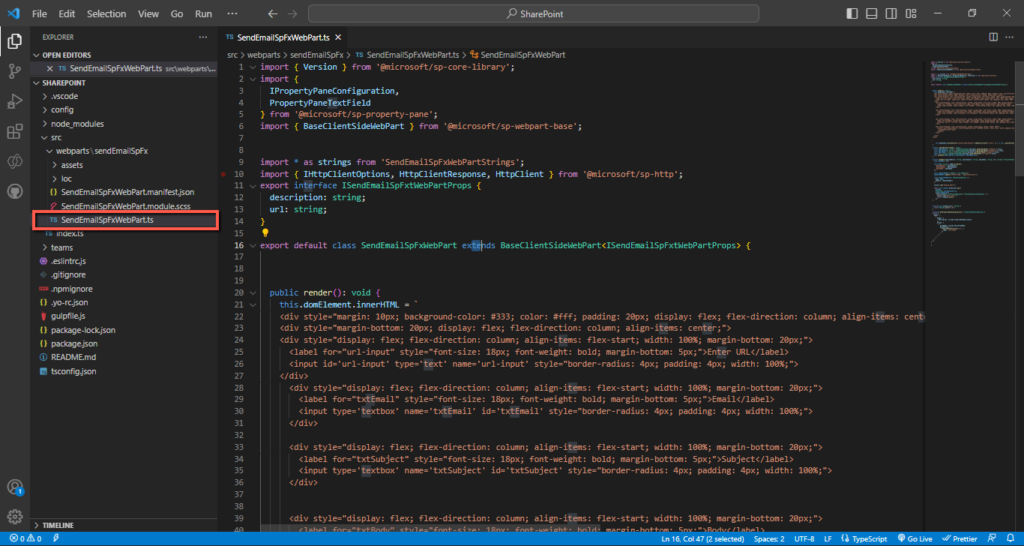
import { Version } from ‘@microsoft/sp-core-library’;
import {
IPropertyPaneConfiguration,
PropertyPaneTextField
} from ‘@microsoft/sp-property-pane’;
import { BaseClientSideWebPart } from ‘@microsoft/sp-webpart-base’;
import * as strings from ‘SendEmailSPFxWebPartStrings’;
import { IHttpClientOptions, HttpClientResponse, HttpClient } from ‘@microsoft/sp-http’;
export interface ISendEmailSPFxWebPartProps {
description: string;
url: string;
}
export default class SendEmailSPFxWebPart extends BaseClientSideWebPart<ISendEmailSPFxWebPartProps> {
public render(): void {
this.domElement.innerHTML = `
<div style=”margin: 10px; background-color: #333; color: #fff; padding: 20px; display: flex; flex-direction: column; align-items: center; text-align: center;”>
<div style=”margin-bottom: 20px; display: flex; flex-direction: column; align-items: center;”>
<div style=”display: flex; flex-direction: column; align-items: flex-start; width: 100%; margin-bottom: 20px;”>
<label for=”url-input” style=”font-size: 18px; font-weight: bold; margin-bottom: 5px;”>Enter URL</label>
<input id=’url-input’ type=’text’ name=’url-input’ style=”border-radius: 4px; padding: 4px; width: 100%;”>
</div>
<div style=”display: flex; flex-direction: column; align-items: flex-start; width: 100%; margin-bottom: 20px;”> <label for=”txtEmail” style=”font-size: 18px; font-weight: bold; margin-bottom: 5px;”>Email</label>
<input type=’textbox’ name=’txtEmail’ id=’txtEmail’ style=”border-radius: 4px; padding: 4px; width: 100%;”>
</div>
<div style=”display: flex; flex-direction: column; align-items: flex-start; width: 100%; margin-bottom: 20px;”>
<label for=”txtSubject” style=”font-size: 18px; font-weight: bold; margin-bottom: 5px;”>Subject</label>
<input type=’textbox’ name=’txtSubject’ id=’txtSubject’ style=”border-radius: 4px; padding: 4px; width: 100%;”>
</div>
<div style=”display: flex; flex-direction: column; align-items: flex-start; width: 100%; margin-bottom: 20px;”>
<label for=”txtBody” style=”font-size: 18px; font-weight: bold; margin-bottom: 5px;”>Body</label>
<textarea rows=”4″ cols=”50″ name=’txtBody’ id=’txtBody’ style=”border-radius: 4px; padding: 4px; width: 100%;”></textarea>
</div>
<div style=”display: flex; flex-direction: column; align-items: center; width: 100%;”>
<button class=”email-Button” style=”background-color: #4CAF50; border: none; color: white; padding: 8px 16px; text-align: center; text-decoration: none; display: inline-block; font-size: 16px; margin: 4px 2px; cursor: pointer; border-radius: 4px; width: 50%;”>
<span>Send email</span>
</button>
</div>
</div>
</div>
`;
this.domElement.querySelector(‘button.email-Button’).addEventListener(‘click’, () => { this._emailButtonClicked();
});
}
private _emailButtonClicked(): void {
const emailAddress: string = (<HTMLInputElement>document.getElementById(“txtEmail”)).value;
const emailSubject: string = (<HTMLInputElement>document.getElementById(“txtSubject”)).value;
const emailBody: string = (<HTMLInputElement>document.getElementById(“txtBody”)).value;
const url: string = (<HTMLInputElement>document.getElementById(“url-input”)).value;
this.sendEmail(emailAddress, emailSubject, emailBody,url);
}
private sendEmail(emailAddress: string, emailSubject: string, emailBody: string, url: string):
Promise<HttpClientResponse> {
const postURL = url;
const body: string = JSON.stringify({
’emailaddress’: emailAddress,
’emailSubject’: emailSubject,
’emailBody’: emailBody,
});
const requestHeaders: Headers = new Headers();
requestHeaders.append(‘Content-type’, ‘application/json’);
const httpClientOptions: IHttpClientOptions = {
body: body,
headers: requestHeaders
};
console.log(“Sending Email”);
return this.context.httpClient.post(
postURL,
HttpClient.configurations.v1,
httpClientOptions)
.then((response: HttpClientResponse): Promise<HttpClientResponse> => {
console.log(“Email sent.”);
return response.json();
});
}
protected get dataVersion(): Version {
return Version.parse(‘1.0’);
}
protected getPropertyPaneConfiguration(): IPropertyPaneConfiguration {
return {
pages: [
{
header: {
description: strings.PropertyPaneDescription
},
groups: [
{
groupName: strings.BasicGroupName,
groupFields: [
PropertyPaneTextField(‘url’, {
label: ‘url-input’
})
]
}
]
}
]
};
}
}
Code explanation:
2.1 private _emailButtonClicked(): void {}
This private method is triggered when the user submits the form. It gets the email address, subject, body, and URL values from the input fields of the form and then calls the sendEmail() method and passes these values as arguments.
2.2 private sendEmail(emailAddress: string, emailSubject: string, emailBody: string, url: string): Promise<HttpClientResponse> {}
This method sends an email using the SharePoint Framework’s httpClient. It creates a JSON object with the “email address”, “subject”, and “body”, sets the content type header to ‘application/json’, and then sends this JSON object to the URL entered by the user. Once the response is received from the flow, it returns a Promise object that resolves to the response.
2.3 protected get dataVersion(): Version {}
This method returns the version number of the data model used by the web part. It is required by the SharePoint Framework.
2.4 protected getPropertyPaneConfiguration(): IPropertyPaneConfiguration {}
This method returns the configuration object for the property pane of the web part. This example returns a simple object with a single text field for the “URL” input. This is also required by the SharePoint Framework to configure the web part’s property pane.
2.5 HTML code
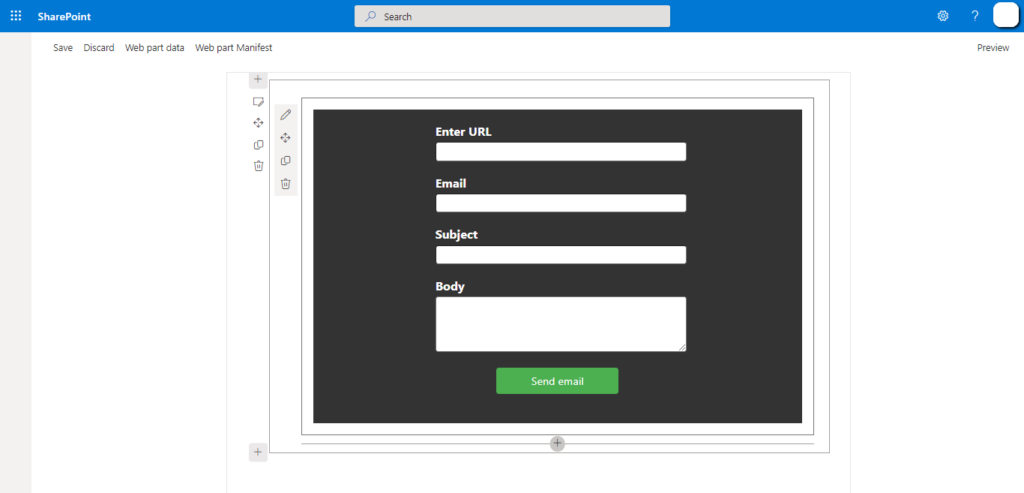
The HTML in the public render method makes the following form in the web part.

3. Test the Web Part
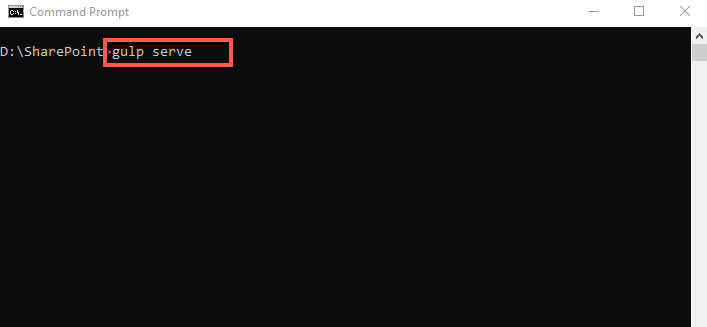
Open the command prompt and run the following command.
gulp serve
The default browser will open, and you can then add your newly created web part.
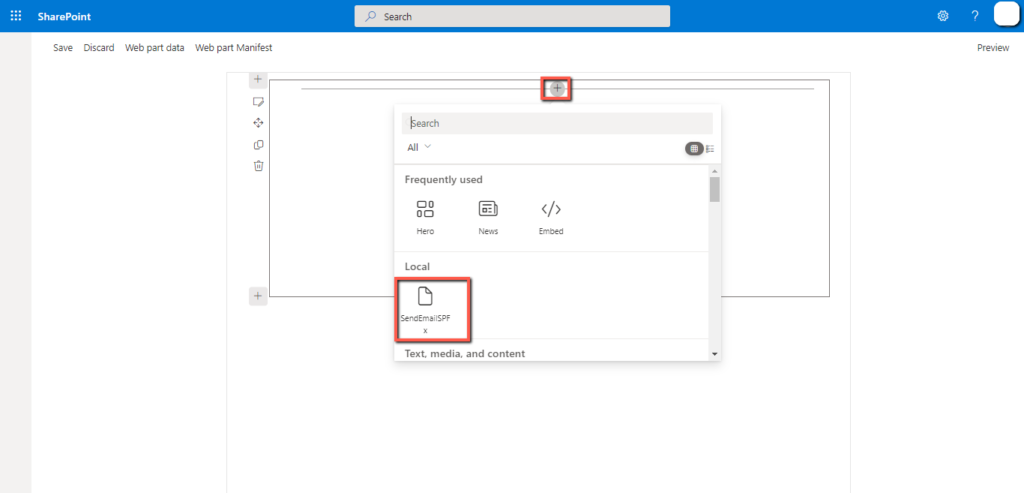
You will see the following form.
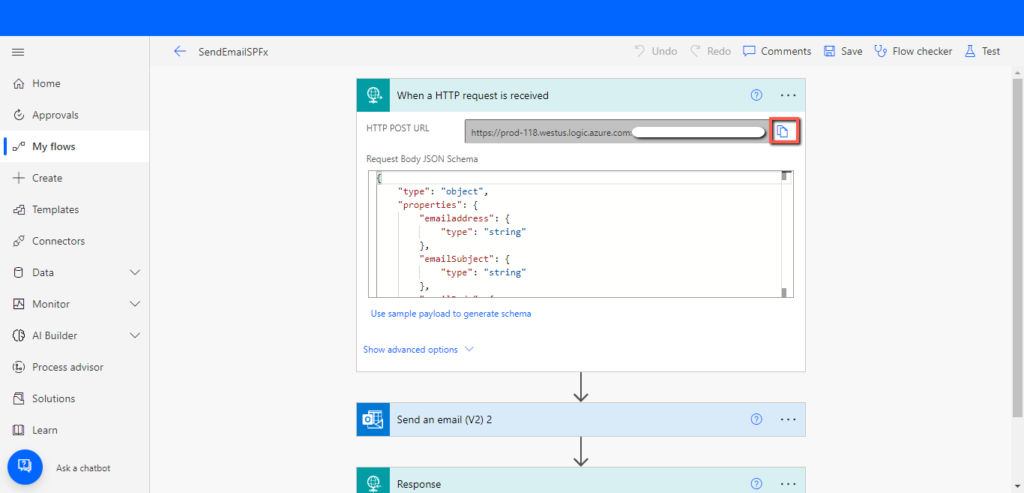
Open the “Flow” that we created in the first step.
Click on the “Copy” icon to copy the “URL” of the flow.
Add the “URL” of flow in the “Enter URL” field.
Add the “Email”, “Subject”, and “Body” in their respective fields and click on the “Send Email” button.

Received the email as follows.

