In this article, our goal is to convert speech to text in PowerApps using a custom connector with OpenAI.
1. Generate the OpenAI API key
Follow the below steps to generate your “API key” to use in the Power Automate flow.
Open the following URL and Sign-up.
https://beta.openai.com/account/api-keys
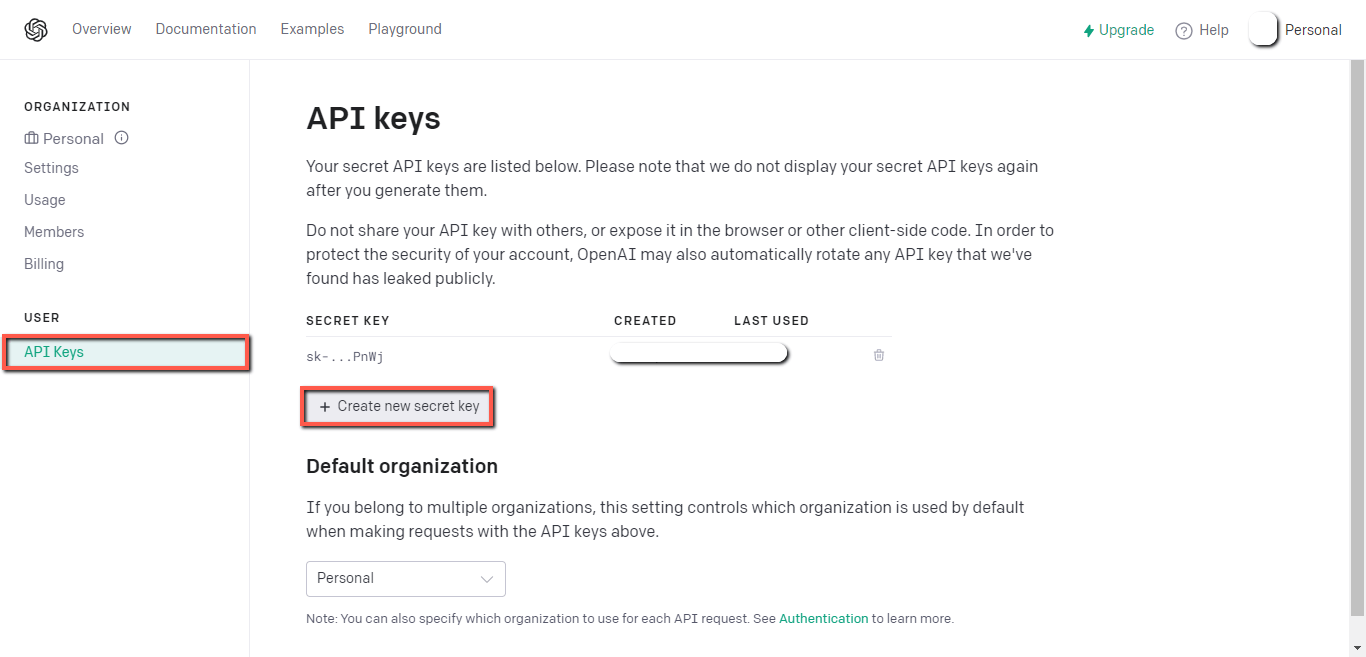
After the sign-up, you will see the following screen.
Click on the “API keys” and click on the “Create new secret key” button.
2. Create custom connector
Open PowerApps studio.
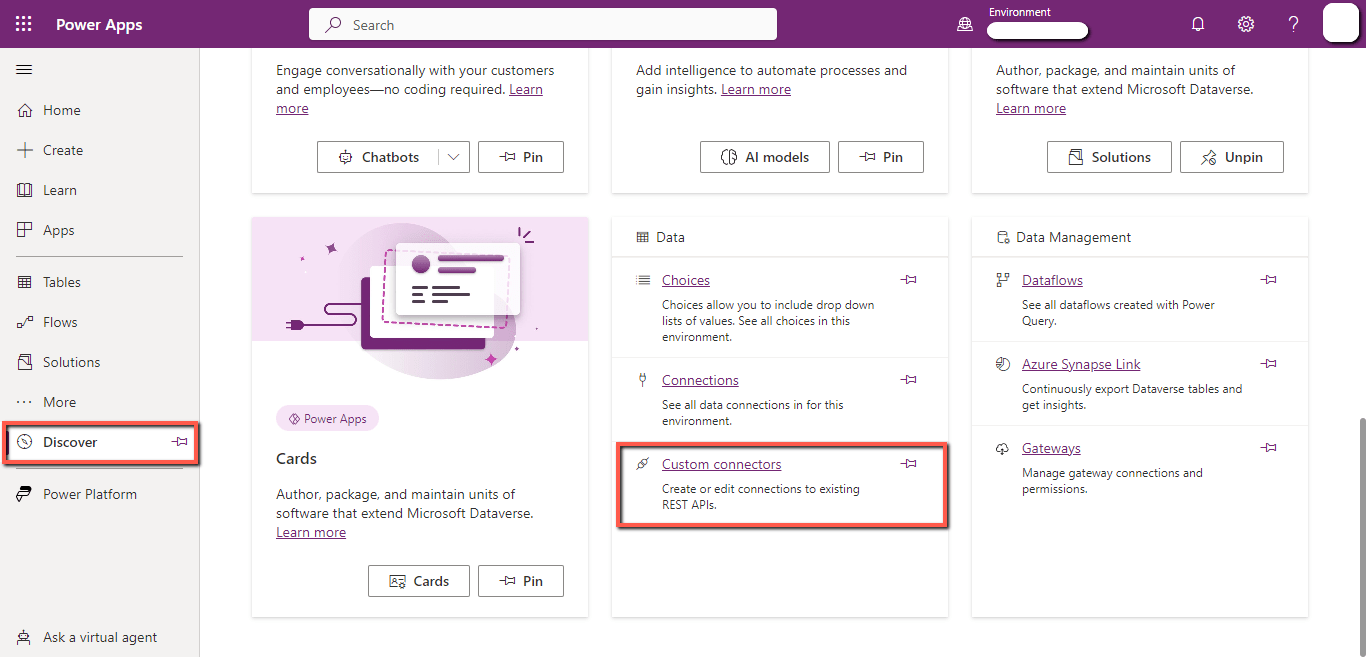
Click on the “More” tab and click on the “Discover all” button.

Click on the “Custom Connectors”.
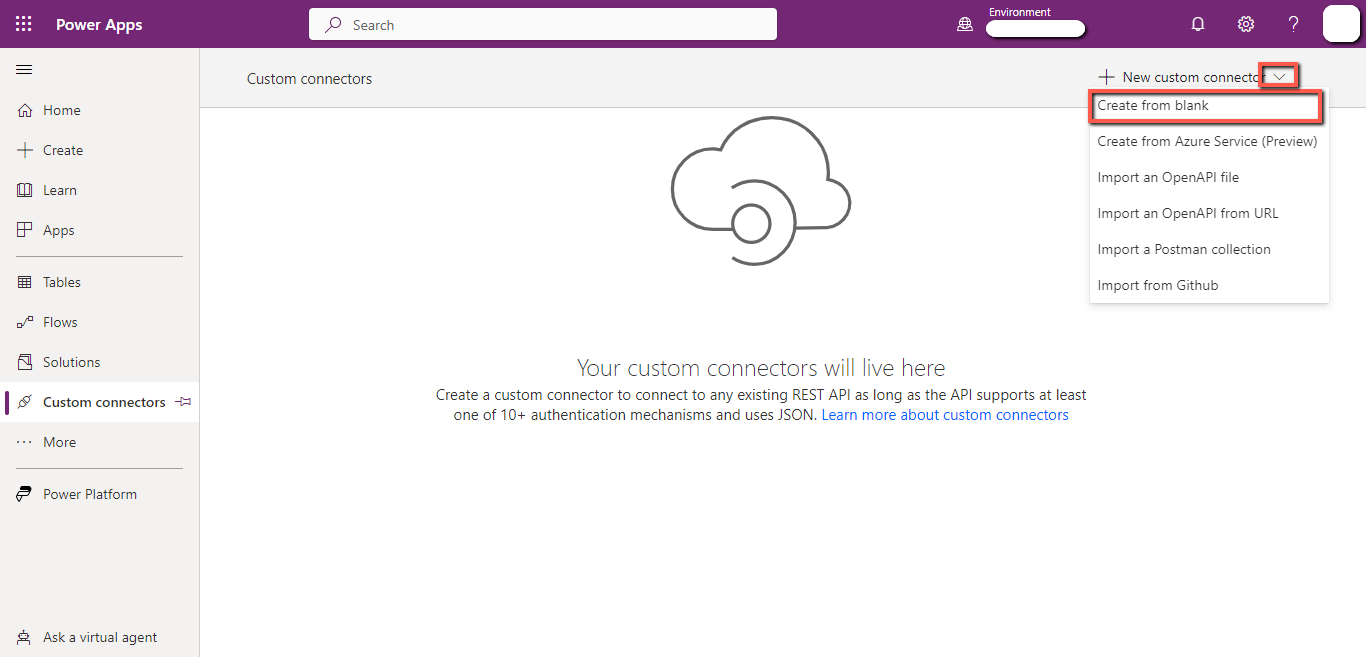
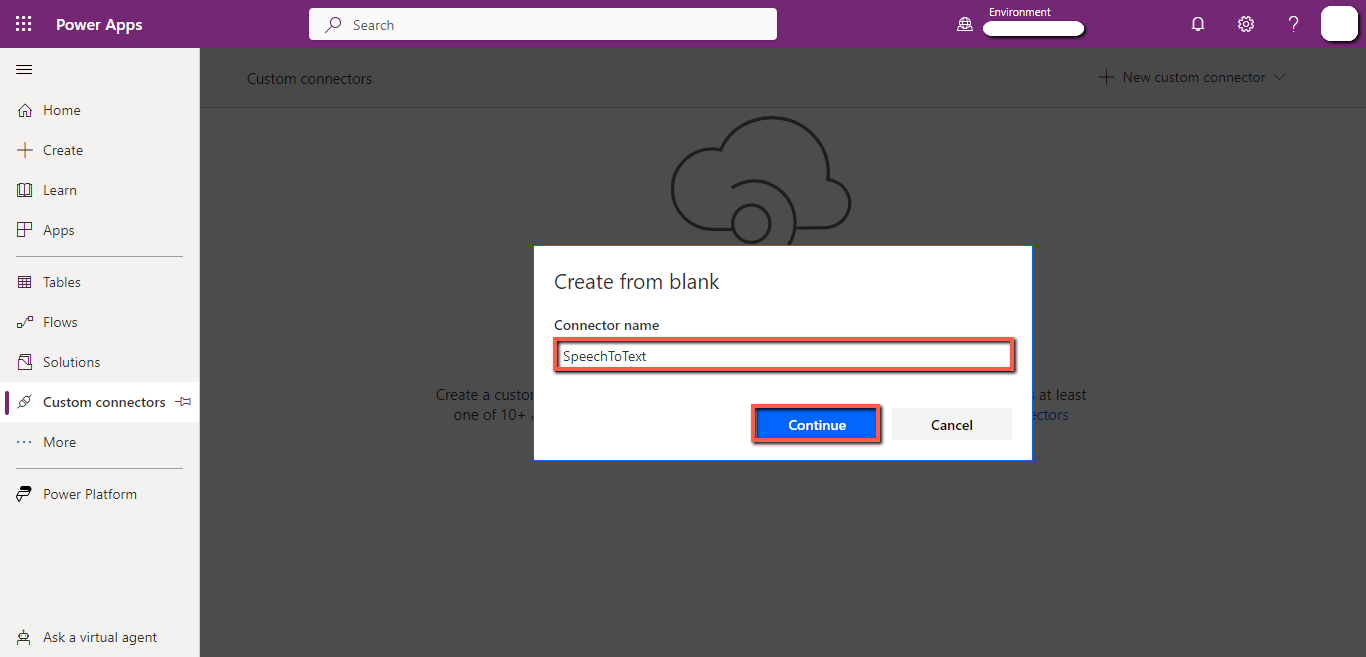
Click on the “New custom connector” dropdown and click on the “Create from blank”.
Write the name of the connector in the “Connector name” field and click on the “Continue” button.
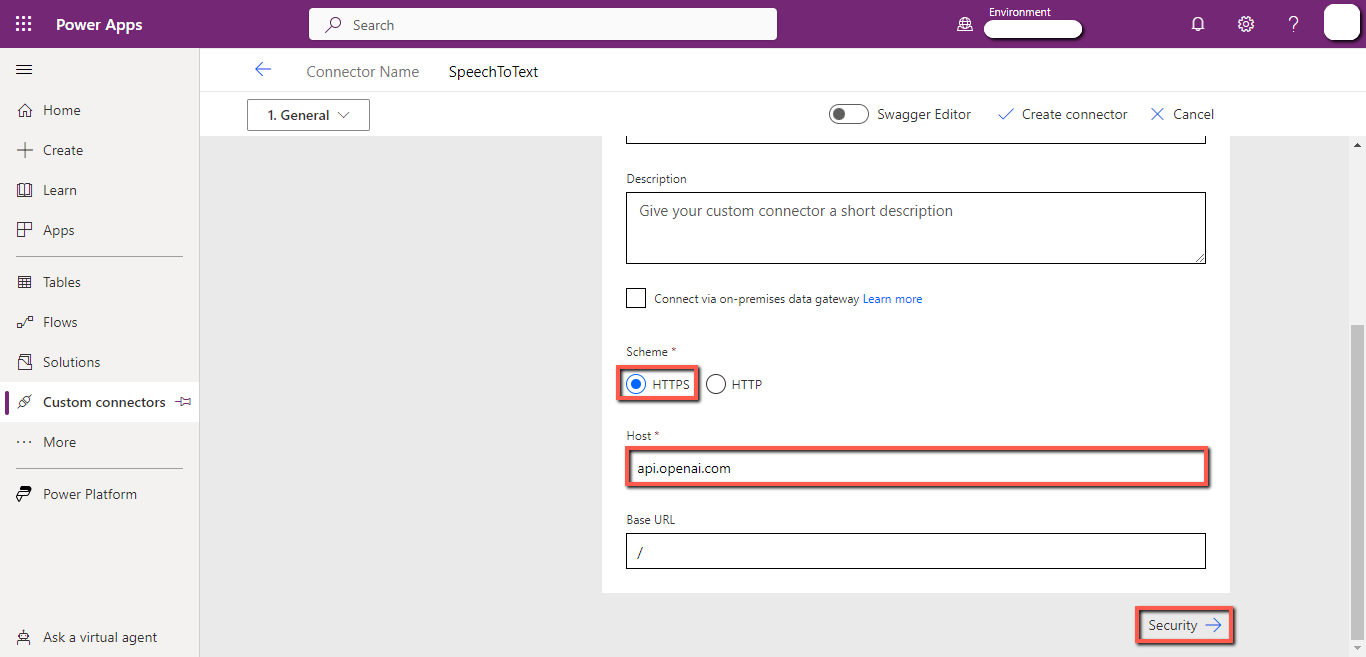
Select the “HTTPS” in the “Scheme” section.
Write “api.openai.com” in the “Host” field.
Click on the “Security” button at the bottom.
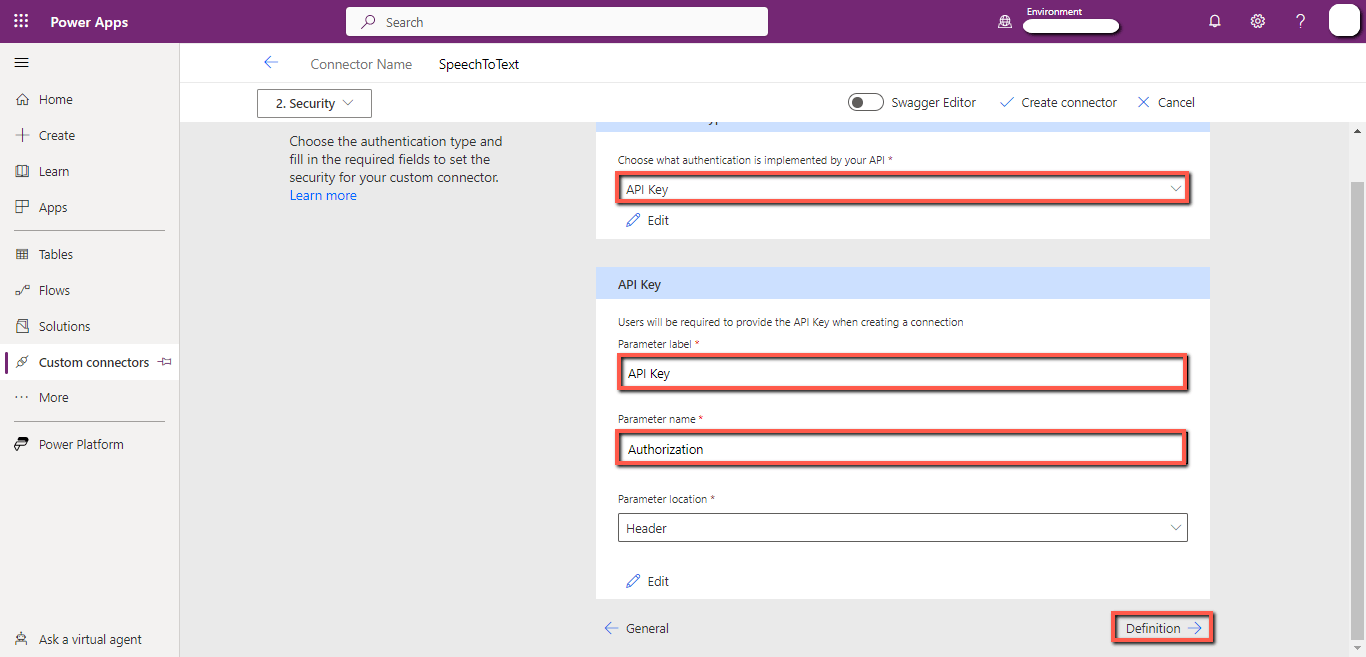
Select the “API Key” as the authentication type.
Write “API Key” in the “Parameter Label” field.
Write “Authorization” in the “Parameter name” field. Click on the “Definition” button at the bottom.
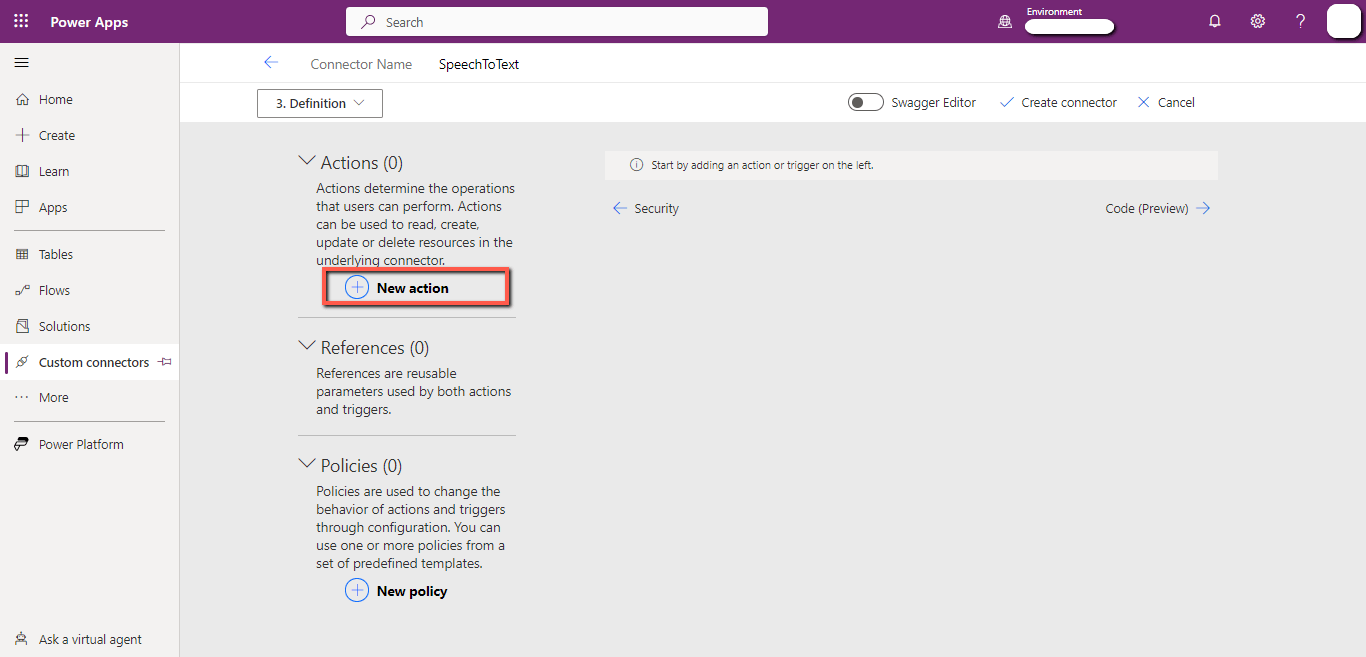
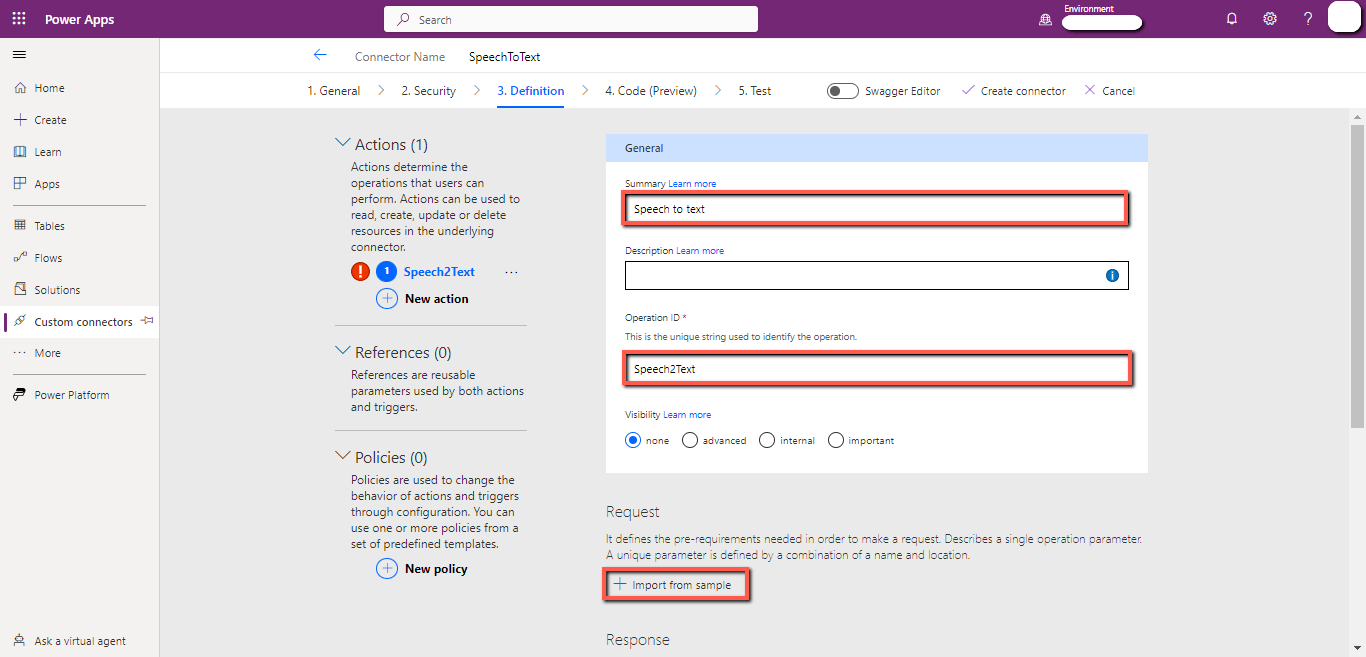
Click on “New action”.
Write “Speech to text” in the “Summary” field.
Write “Speech2Text” in the “Operation ID” field.
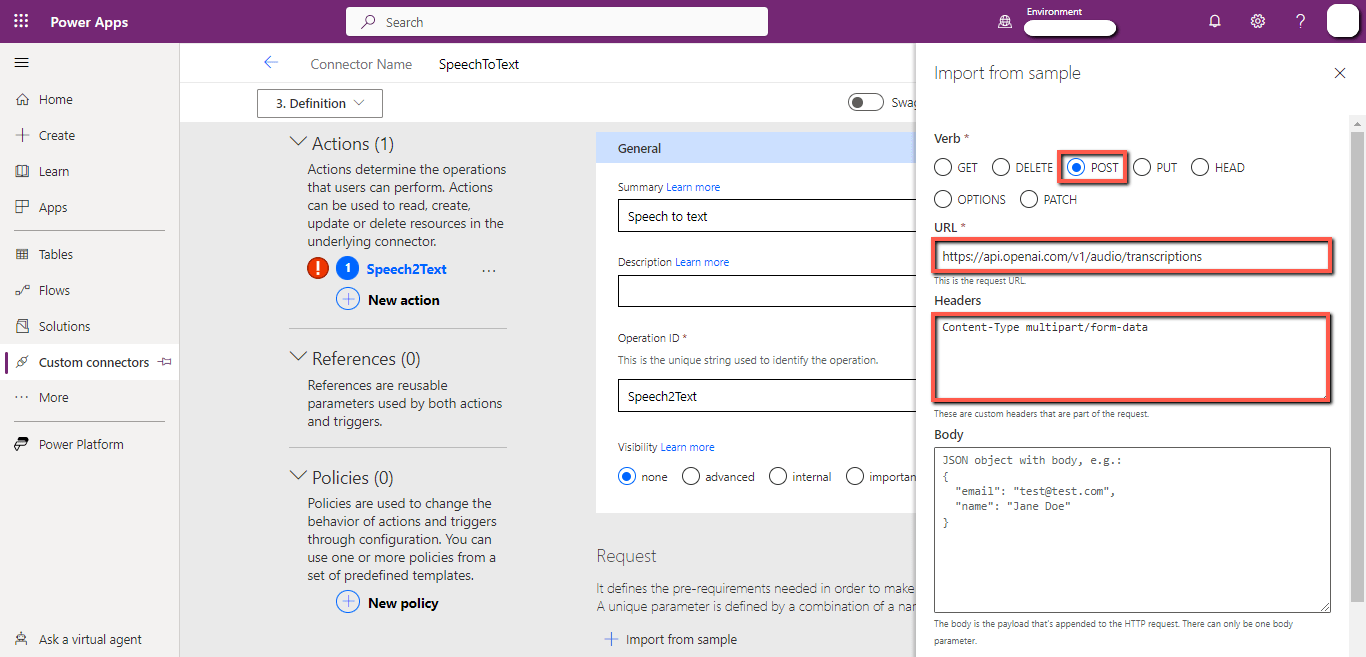
Click on the “Import from sample” tab.
Select “POST” in the “Verb” section.
Write https://api.openai.com/v1/audio/transcriptions in the “URL” field.
Write “Content-Type multipart/form-data” in the “Headers” field.
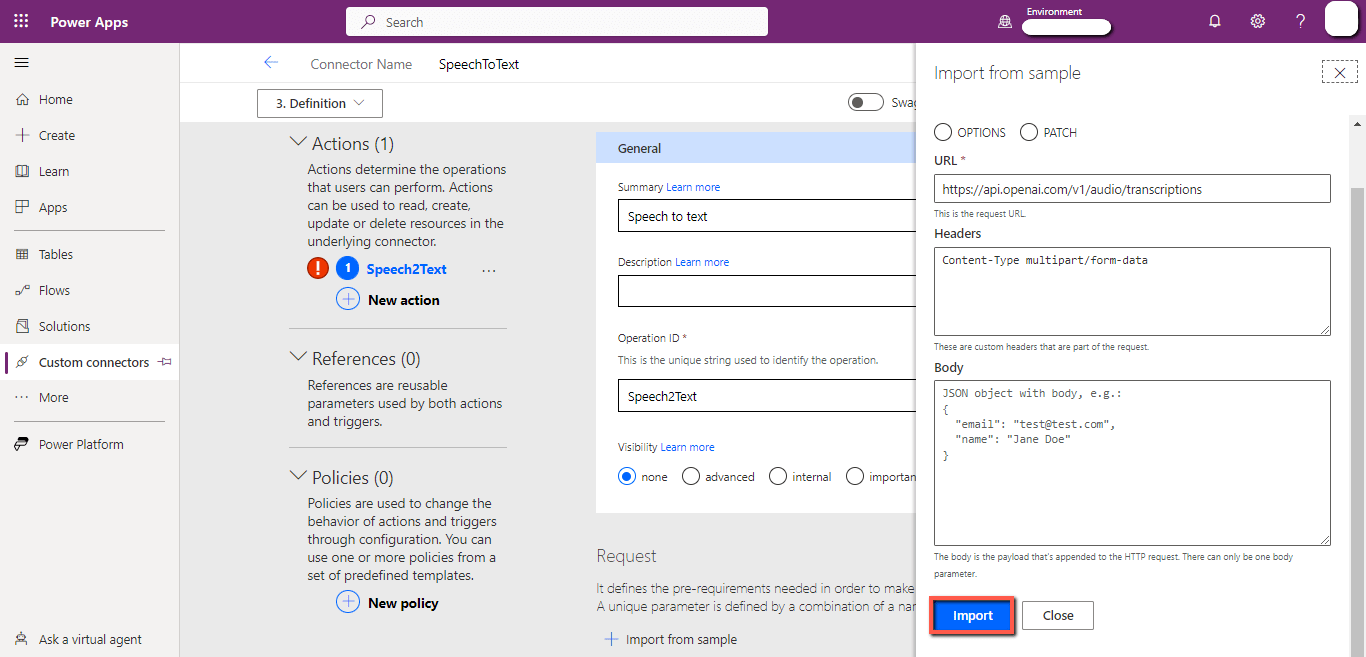
Scroll down and click on the “Import” button.
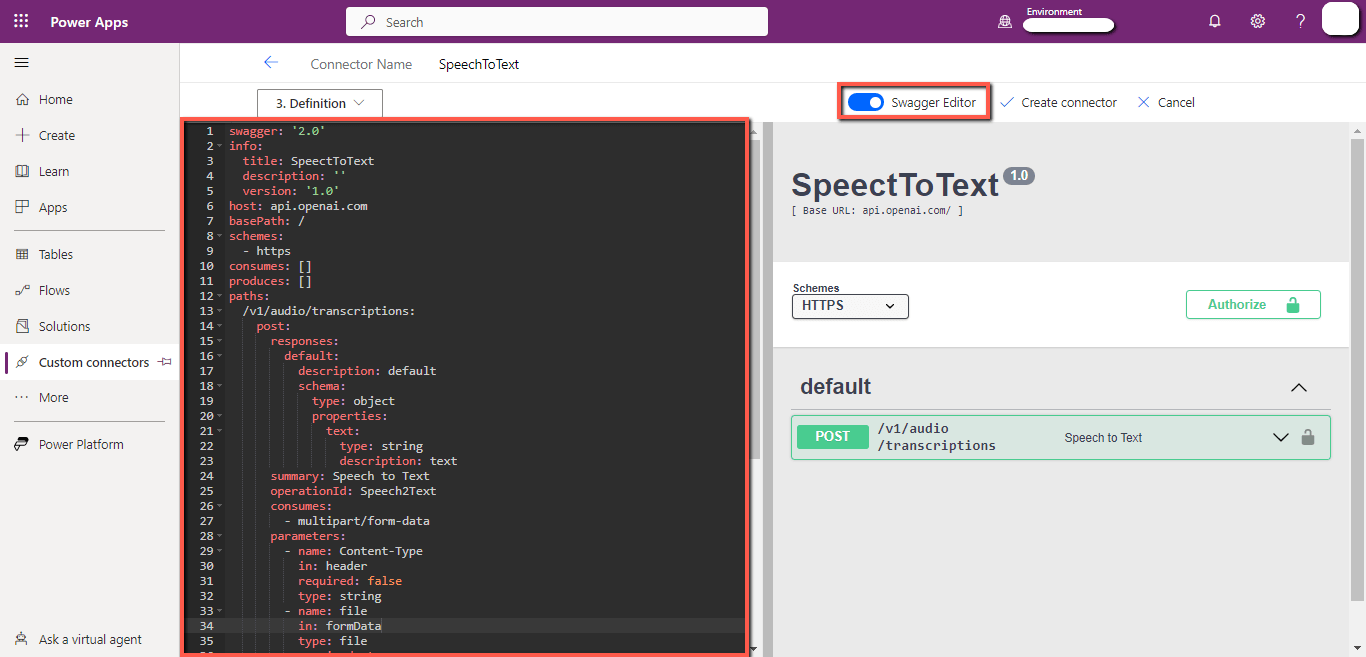
Turn on the “Swagger Editor”.
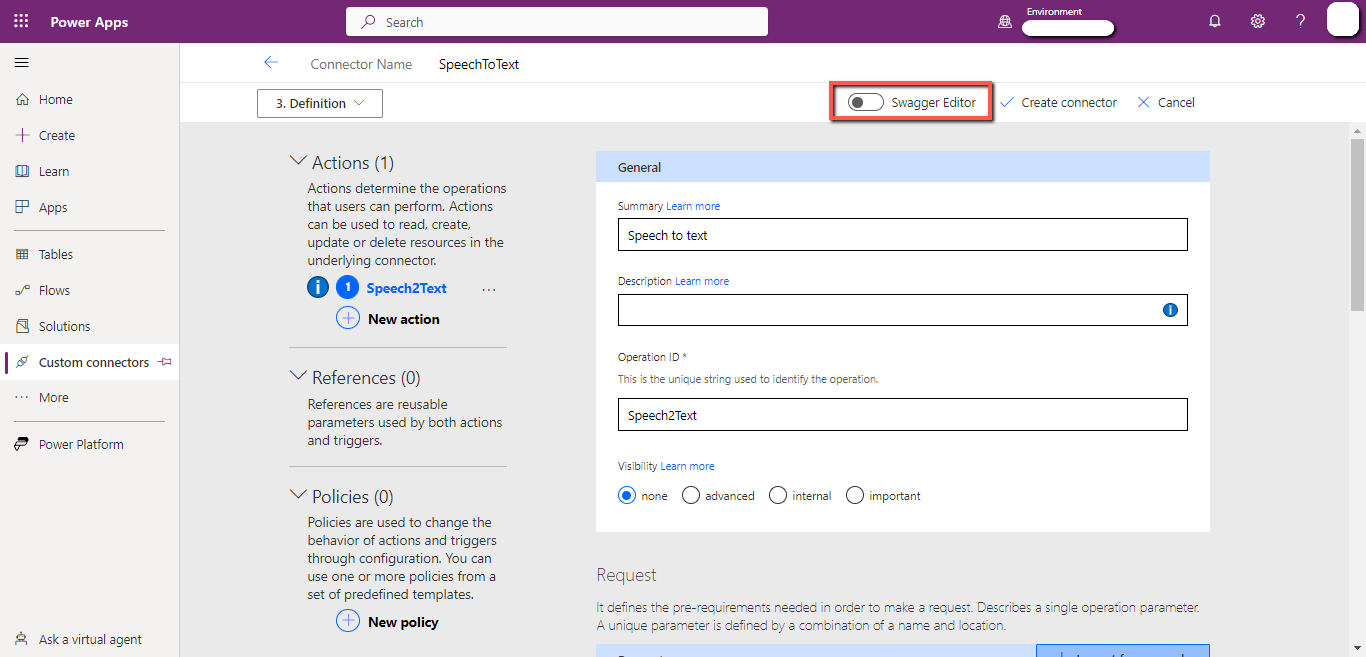
Paste the following code in the left side of the editor and turn off the “Swagger Editor”.
Code:
swagger: ‘2.0’
info:
title: SpeechToText
description: ”
version: ‘1.0’
host: api.openai.com
basePath: /
schemes:
– https
consumes: []
produces: []
paths:
/v1/audio/transcriptions:
post:
responses:
default:
description: default
schema:
type: object
properties:
text:
type: string
description: text
summary: Speech to Text
operationId: Speech2Text
consumes:
– multipart/form-data
parameters:
– name: Content-Type
in: header
required: false
type: string
– name: file
in: formData
type: file
required: true
– name: filename
in: formData
type: string
required: true
– name: model
in: formData
type: string
required: true
definitions: {}
parameters: {}
responses: {}
securityDefinitions:
API Key:
type: apiKey
in: header
name: Authorization
security:
– API Key: []
tags: []
Code explanation:
It defines the API for OpenAI’s SpeechToText model for speech-to-text conversion.
The “info” section contains basic information about the API such as title, description, and version. The “host” section specifies the domain name of the API server.
The “basePath” section specifies the base URL of the API.
The “schemes” section specifies the protocol used by the API. The “consumes” and “produces” sections specify the media types that are supported by the API.
The “paths” section defines the endpoints of the API. In this case, only one endpoint “/v1/audio/transcriptions” is used for speech-to-text conversion.
The “endpoint” accepts a POST request with a file containing audio data and returns a JSON object with the transcribed text.
The “parameters” section defines the parameters that are accepted by the endpoint.
In this case, there are four parameters:
“Content-Type”, “file”, “filename”, and “model”.
The “Content-Type” parameter specifies the media type of the request body. The “file” parameter contains the audio data to be transcribed.
The “filename” parameter specifies the name of the audio file.
The “model” parameter specifies which speech-to-text model to use.
Click on the “default” in the “Response” section.

Click on “Import from sample”.
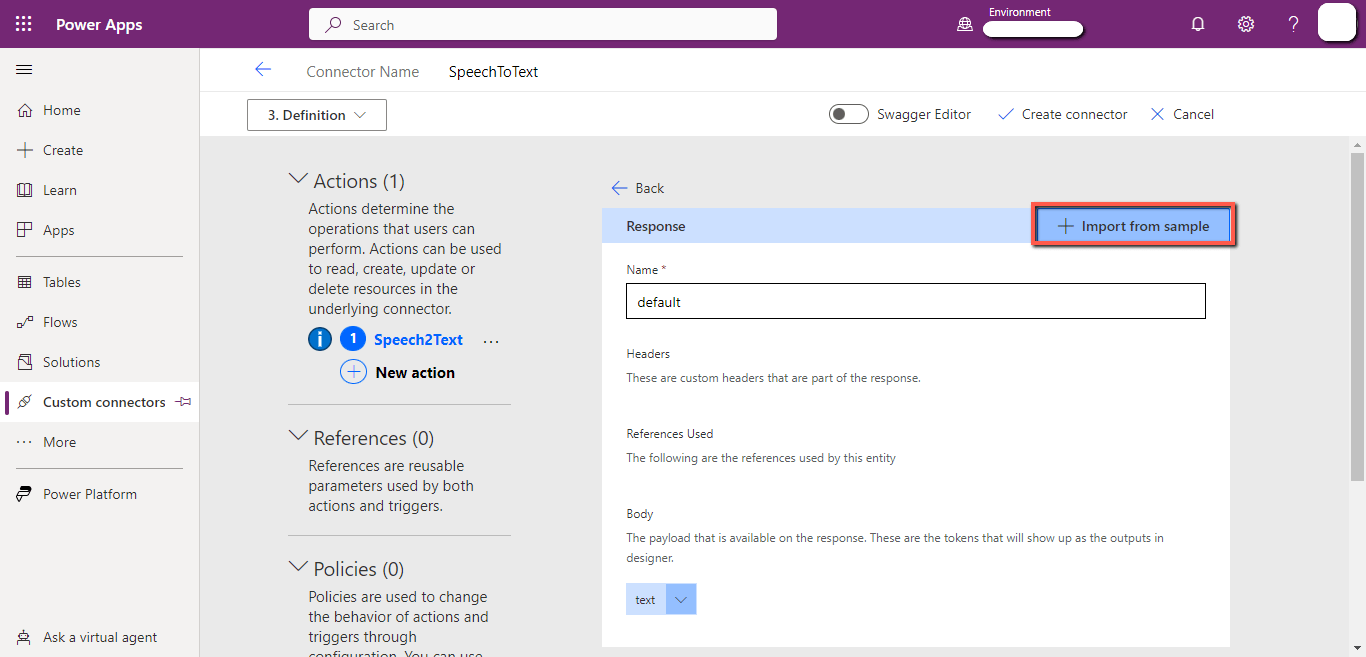
Write {“text”:””} in the “Body” field and click on the “Import” button.

Click on the “Create Connector” button.
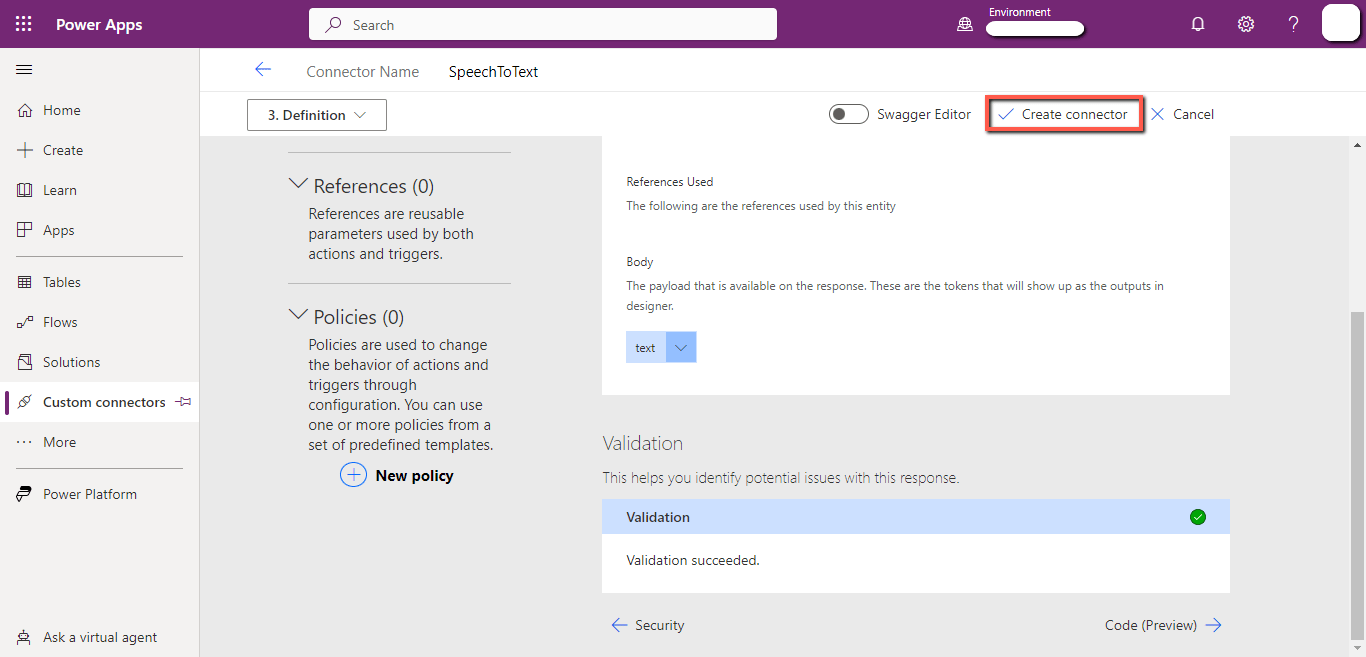
The custom connector is successfully created.
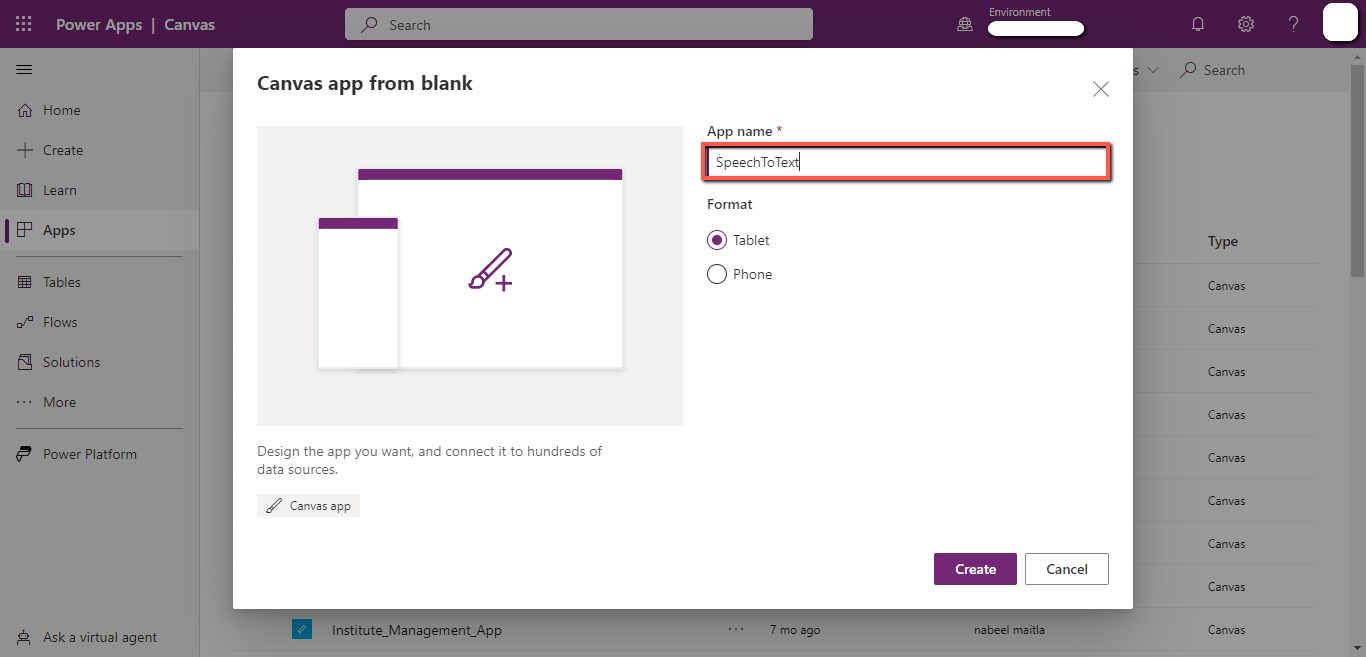
3. Create an App
Create a new “Canvas” PowerApps application.
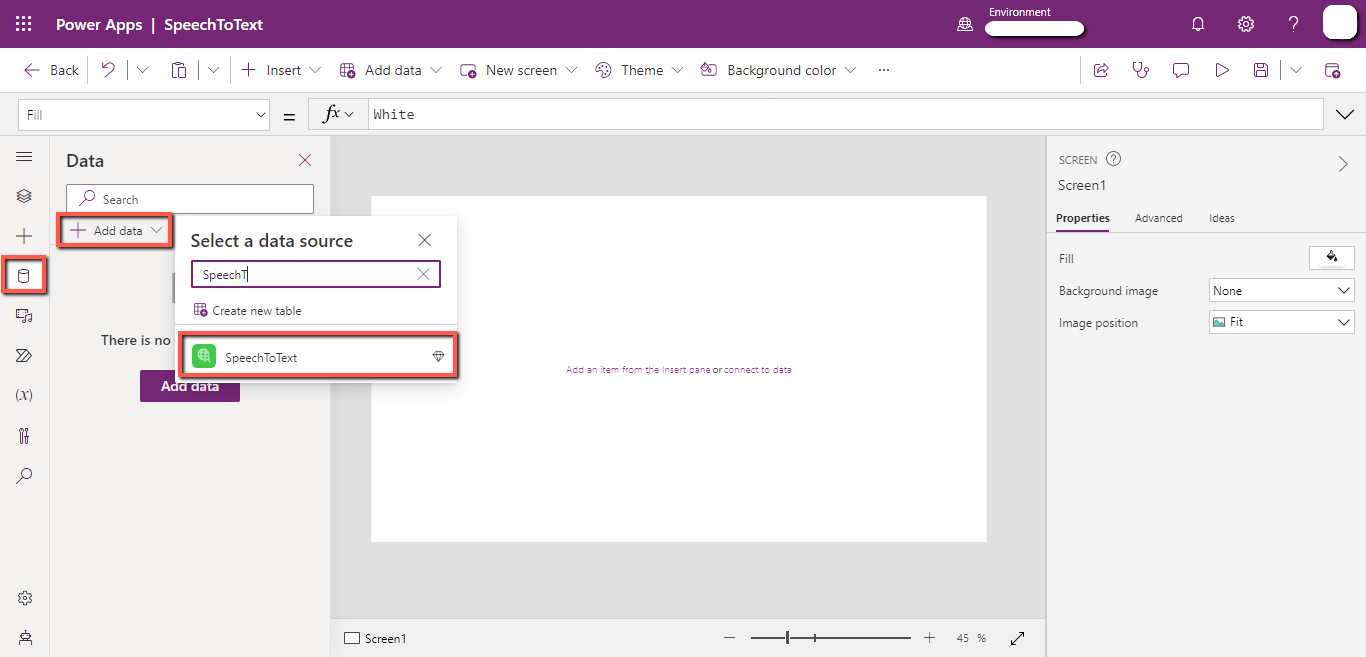
Click on the “Add Data”, search, and add the “SpeechToText” custom connector.
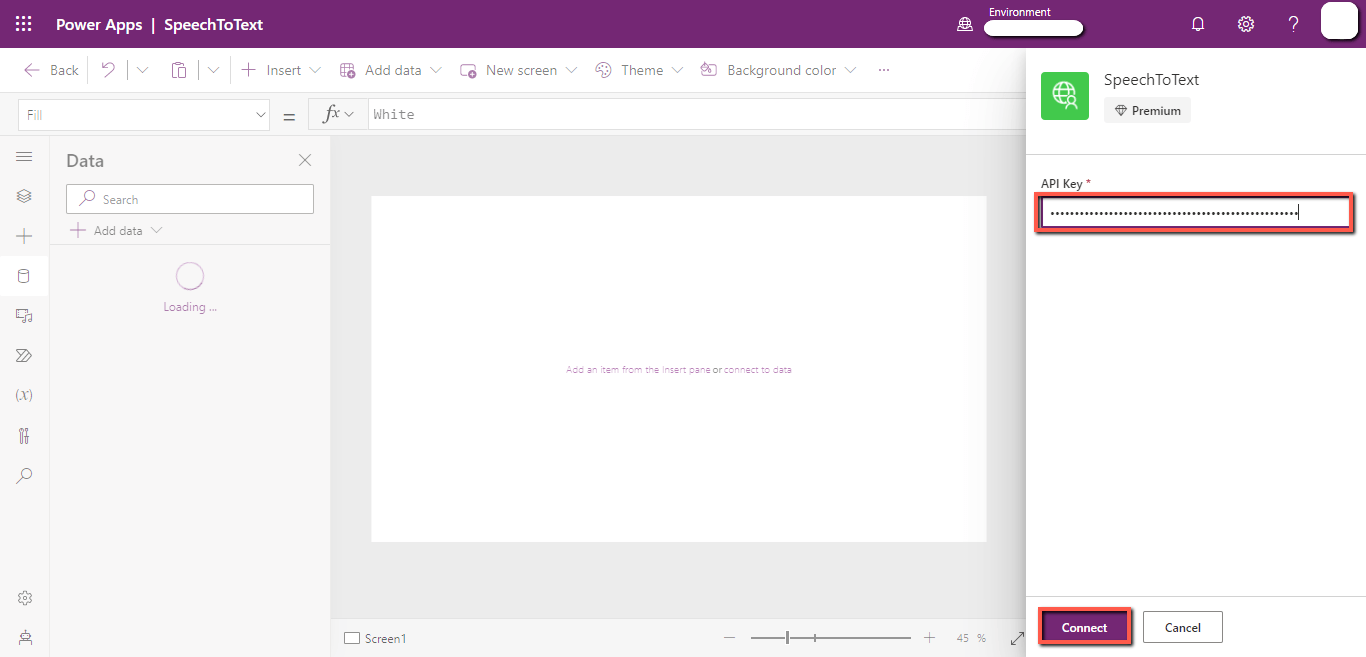
Enter the “API Key” generated in the first step in the below format.
Bearersk23-efq************aef-23mf2
Click on the “Connect” button.
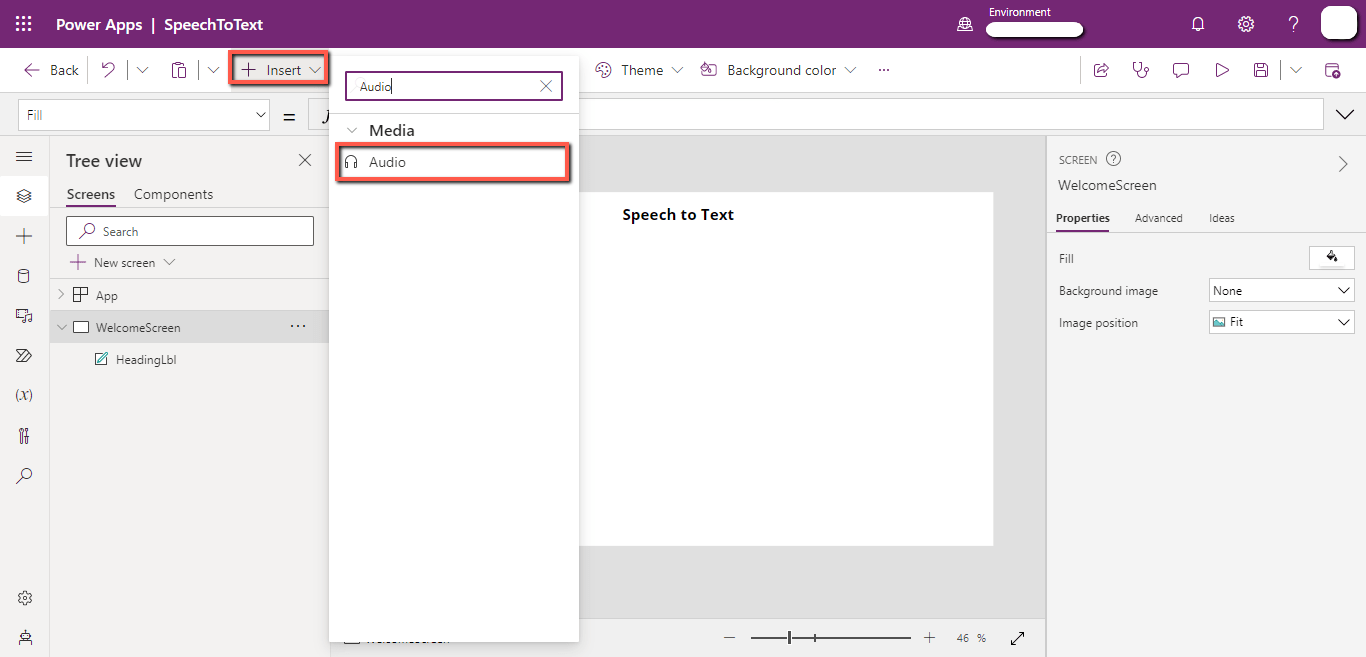
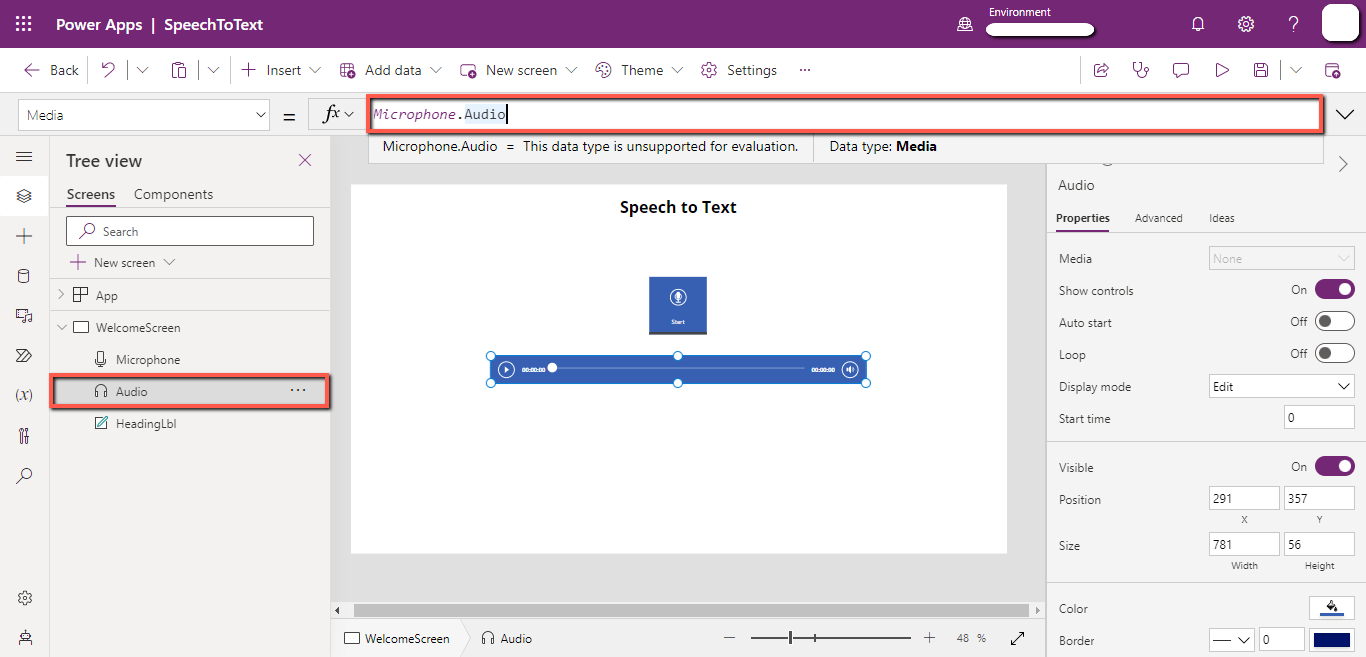
Click on the “Insert” tab and add an “Audio” control.
Similarly, add a “Microphone” control.

Select the “Media” property of the “Audio” controller and write “Microphone.Audio” in it.
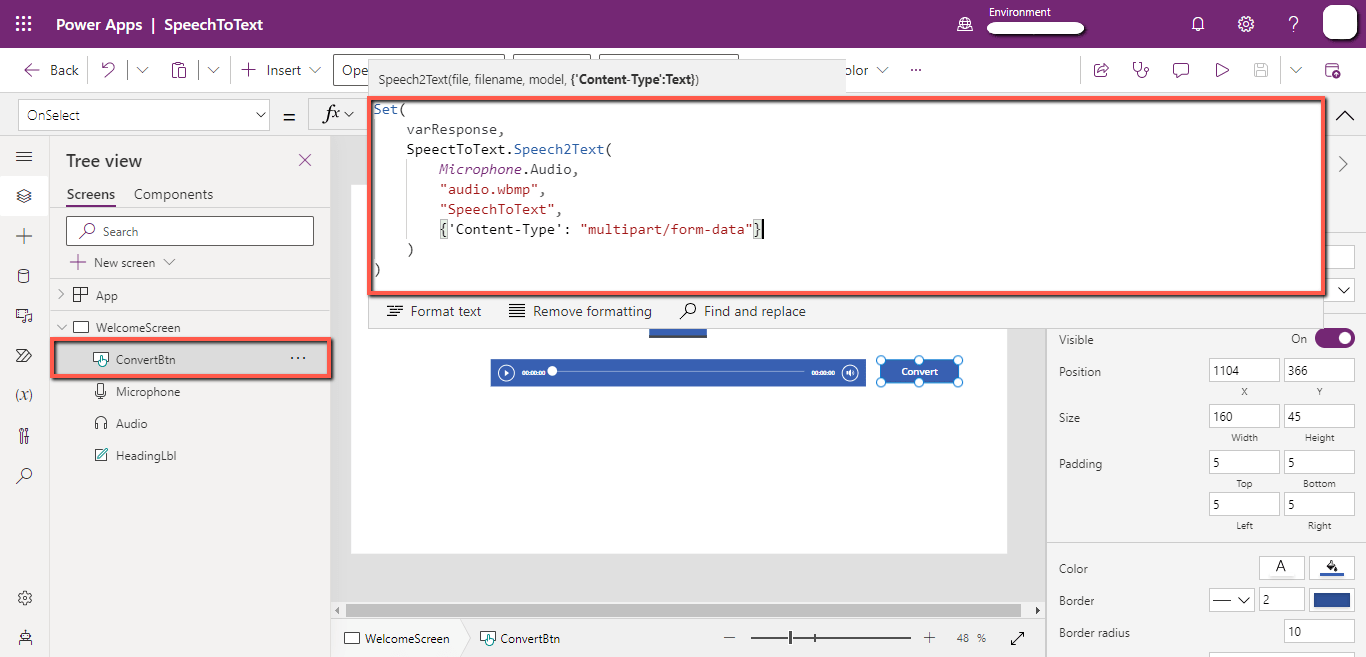
Add a “Button” and paste the following code on the “OnSelect” property of the button.
Code:
Set(
varResponse,
SpeechToText.Speech2Text(
Microphone.Audio,
“audio.wbmp”,
“SpeechToText”,
{‘Content-Type’: “multipart/form-data”}
)
)
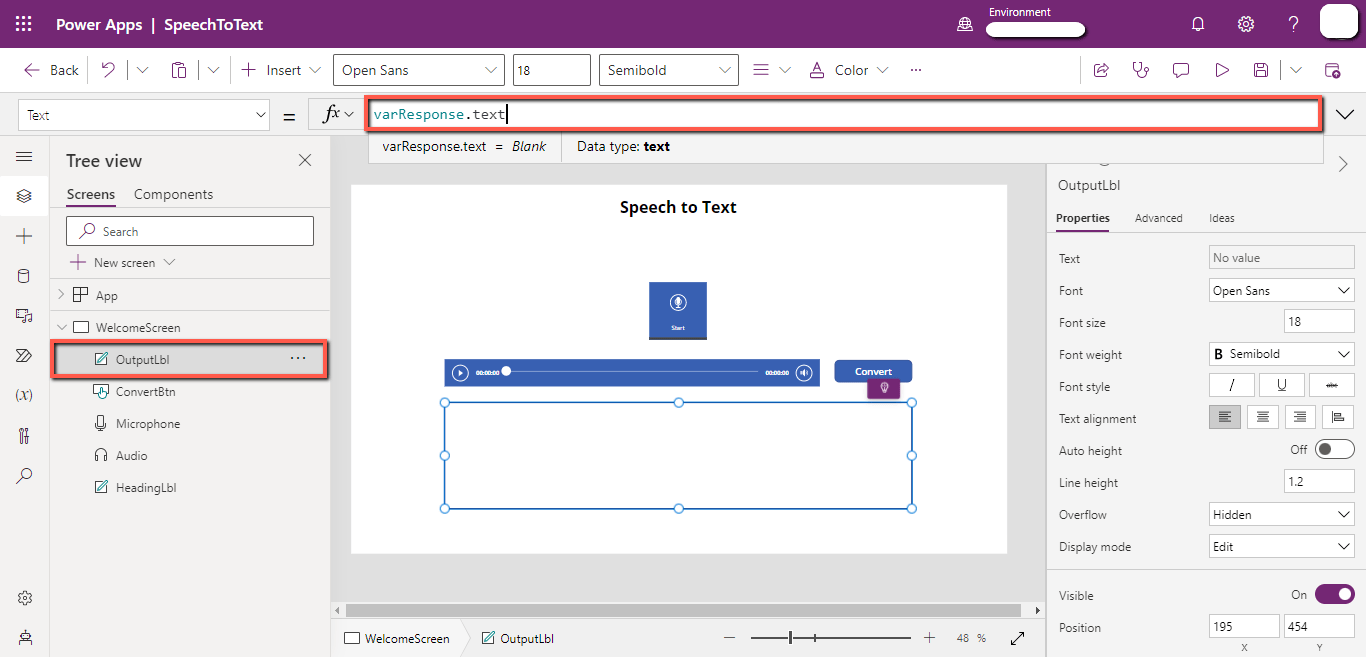
Insert a “Label” and write “varResponse.text” in its “Text” property.
The app is ready to test.
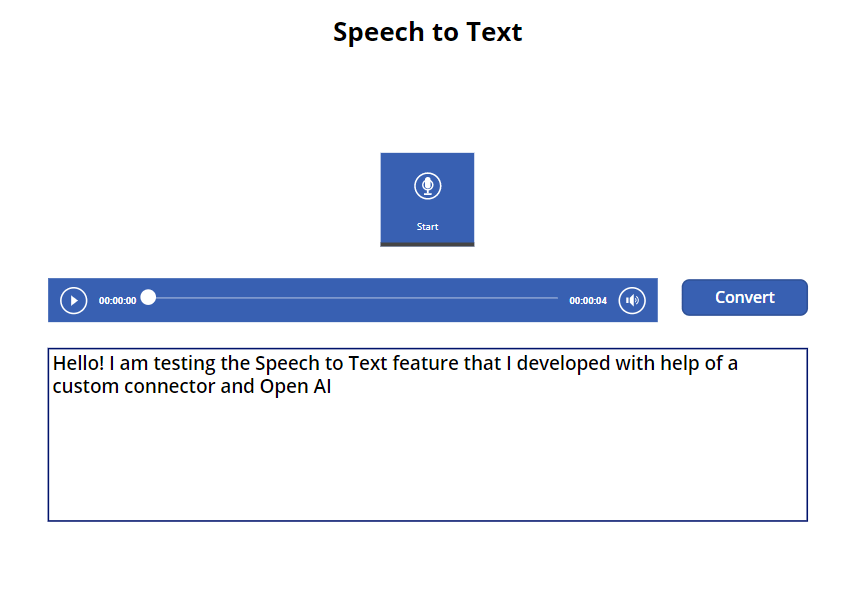
4. Test the app
Play the app, click on the “Microphone” and record your audio.
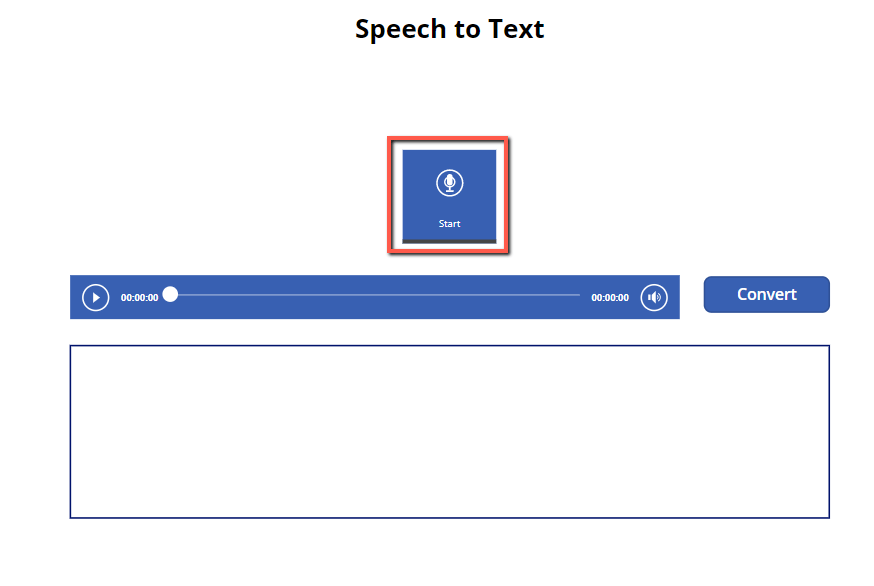
After recording, click on the “Microphone” again to stop the recording and click on the “Convert” button to convert the audio into text.
You will see the converted text in the label below.