In this article we will dynamically access SharePoint lists across multiple SharePoint sites and run a flow on them.
Scenario
We have two SharePoint lists that are located on different SharePoint sites. These lists store the information on day-to-day tasks. We want to create a single workflow that will send email notifications to inform the user about the upcoming tasks from both lists.
1. Create SharePoint lists
Create two SharePoint lists from which we want to get day-to-day tasks.
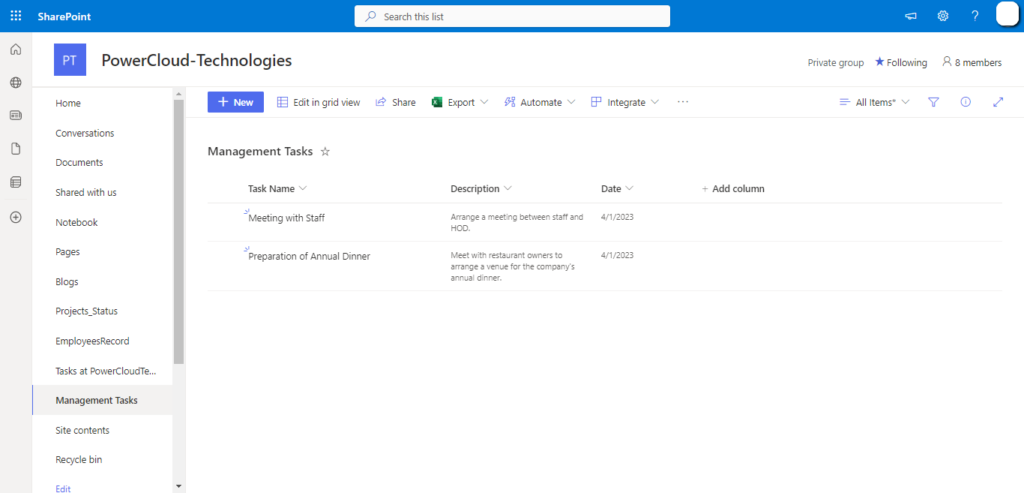
The “Management Tasks” list has the following columns.
- Task Name – (Title)
- Description – (Multiple lines of text)
- Date – (Date and time)
The “Logistics Tasks” has the following columns.
- Task Name – (Title)
- Description – (Multiple lines of text)
- Date – (Date and time)
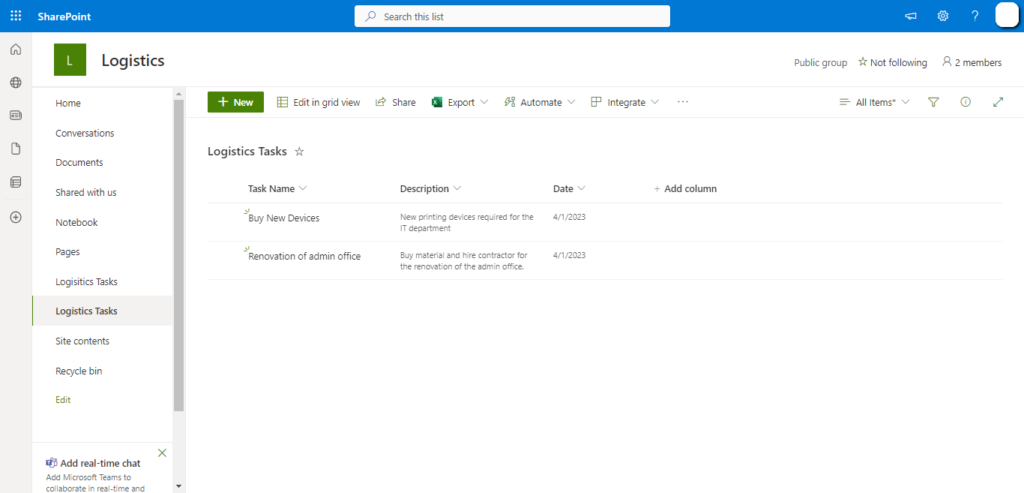
Note: The “Management Tasks” and the “Logistics Tasks” lists exist on different SharePoint sites.
Now create another SharePoint list to store the information of the above two SharePoint lists.
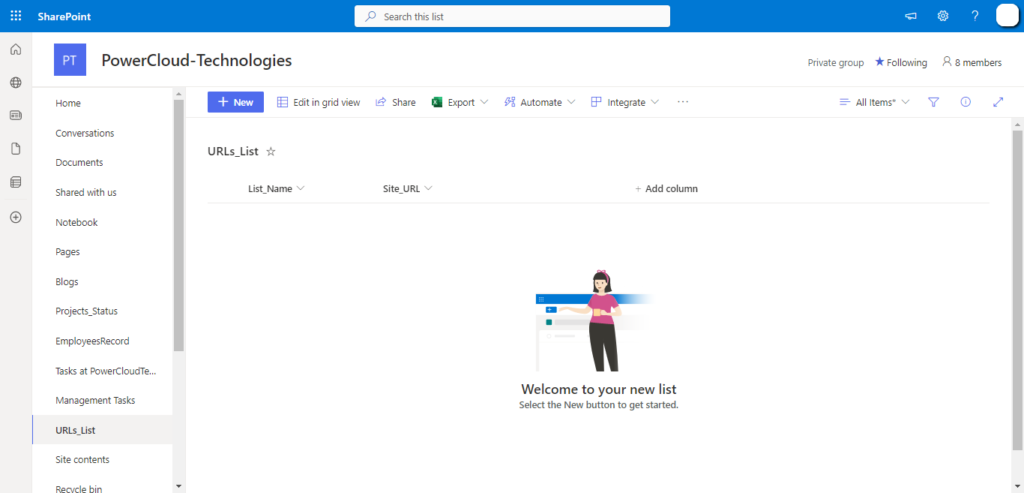
The “URLs_List” has the following columns.
- List_Name – (Title)
- Site_URL – (Hyperlink)
In the “List_Name” column add the name of the above SharePoint lists and in the “Site_URL” column, add URLs of the respective SharePoint sites.
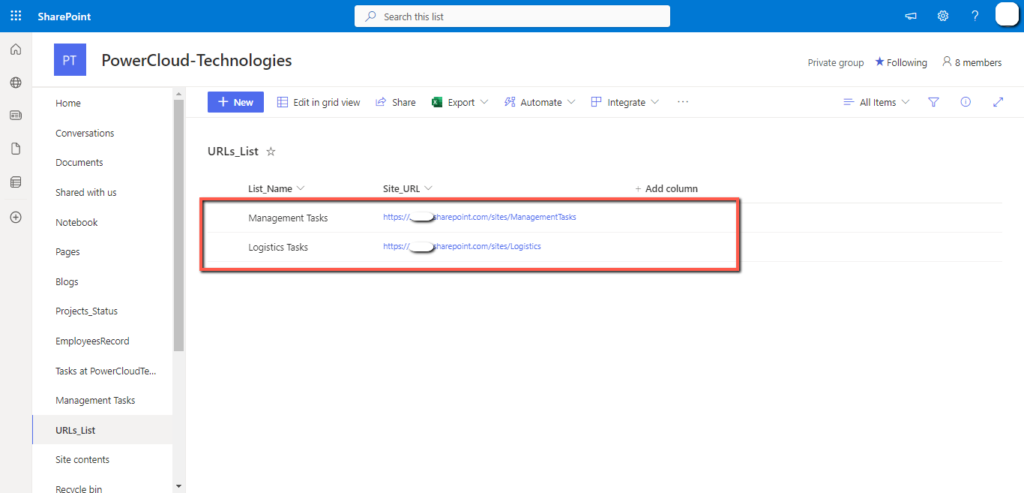
If required, you can add more SharePoint lists in the “URLs_List”.
2. Create Power Automate flow
Open the Power Automate studio.
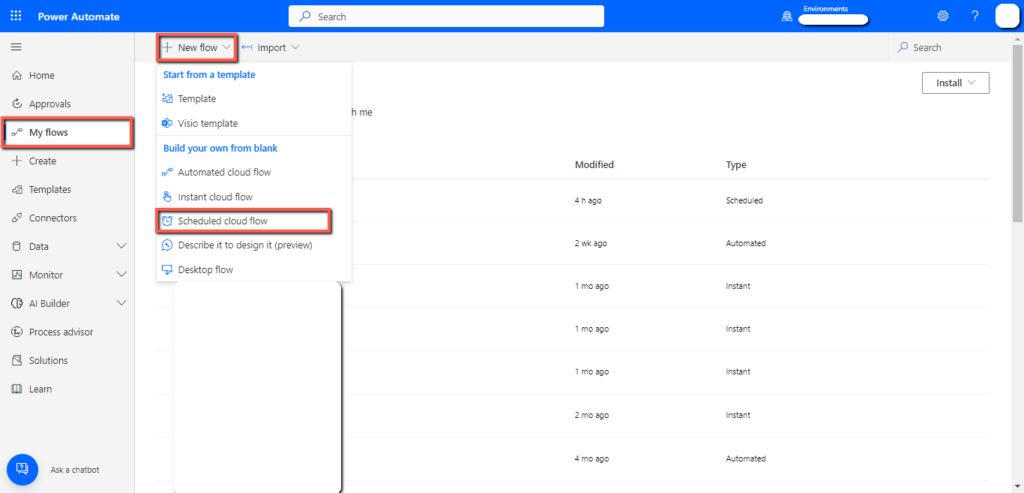
From the left bar click on “My flow”, click on the “New” drop-down, and click on the “Scheduled cloud flow”.
Write the “Flow name”, select the “Starting date and time”, select the “Repeat every” interval, and click on the “Create” button.

Click on the “New step” and add a SharePoint “Get items” action.
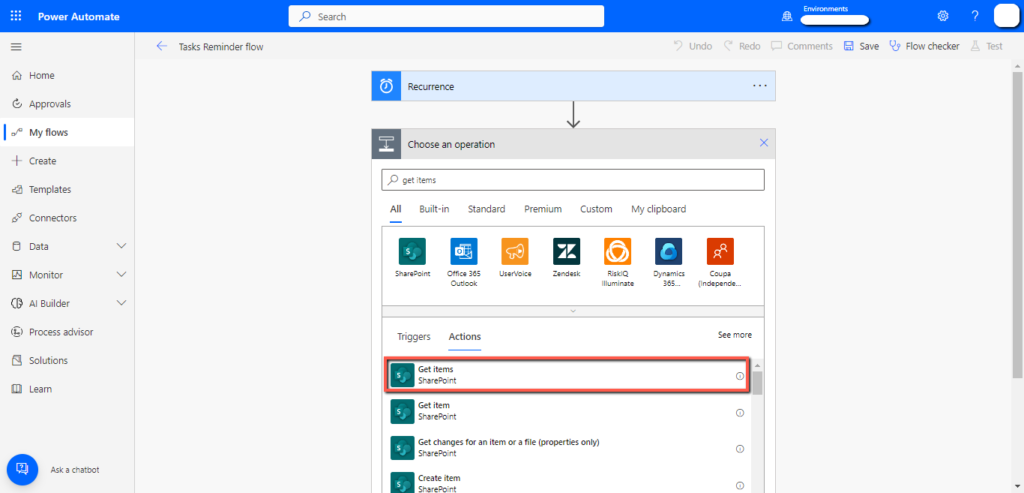
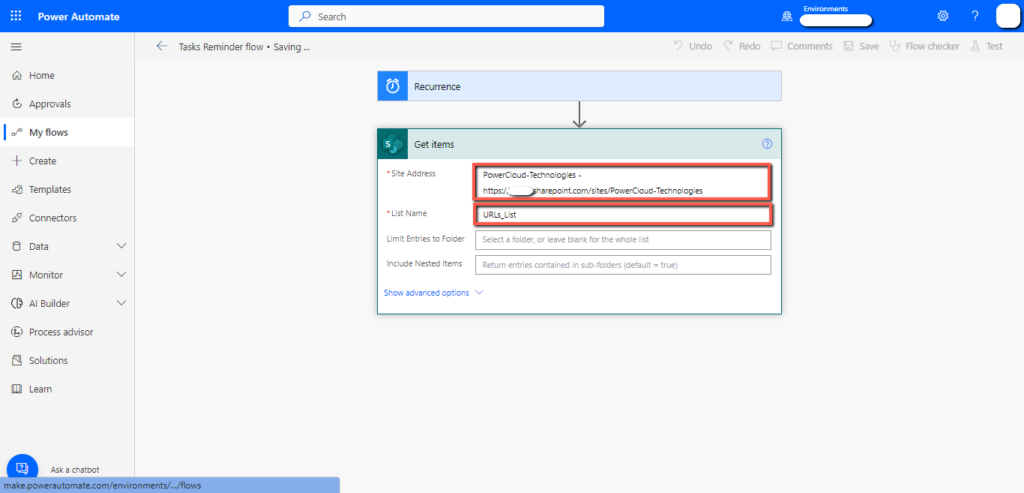
Select the “URLs_List”.
This action will get information on all the lists from the “URLs_List”.
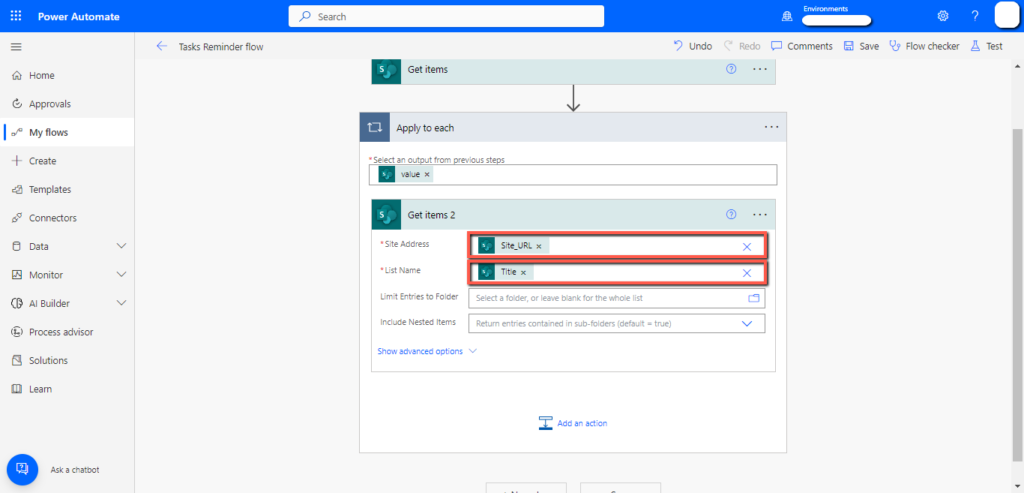
Add another “Get items” action.

From the dynamic content, in the “Site Address”, click on the “Custom value”, add the “Site_URL”, and “Title” in the “List Name” field.
It will automatically get enclosed in the “Apply to each” action.
Now add a “Create HTML table” action.
In the “From” field, add the “Value” from the dynamic content, and select “Custom” for the “Columns” field.
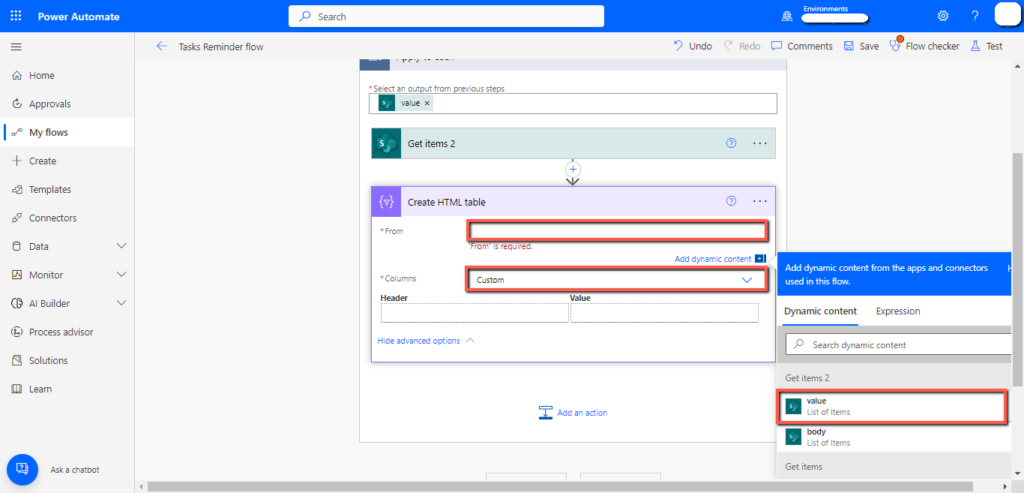
Now add the following names in the “Header” and expressions in the “Value” column.
| Header | Value |
| Task Name | item()?[‘Title’] |
| Description | item()?[‘Description’] |

Now we will add styling to the HTML table.
Add a “Compose” action, paste the following code in it.
<style>
table td, table th {
border: 2px solid #AAAAAA;
padding: 2px 2px;
}
table {
border: 2px solid #1C6EA4;
background-color: #EEEEEE;
width: 100%;
text-align: left;
border-collapse: collapse;
}
table tbody td {
font-size: 13px;
}
table thead {
background: #1C6EA4;
border-bottom: 2px solid #444444;
}
table thead th:first-child {
border-left: none;
}
table thead th {
font-size: 15px;
font-weight: bold;
color: #FFFFFF;
border-left: 2px solid #D0E4F5;
}
</style>
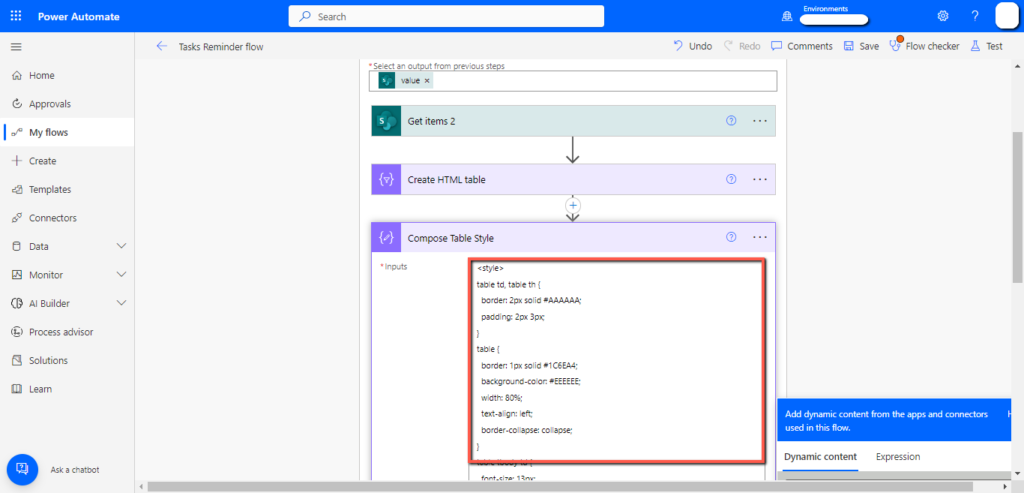
In the above “Compose” action, add the “Outputs” of the “Create HTML table” action after the code.
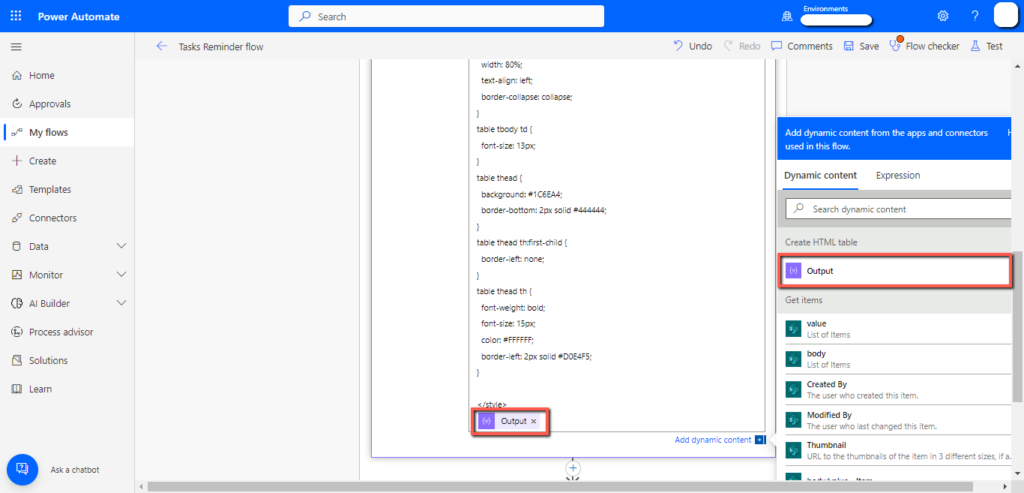
Add a “Send an email V2” action.
Add the recipient’s email in the “To” field, add the “Subject” and in the “Body”, add the “Outputs” of the “Compose Style Table” action.

The flow is now ready.
3. Test the flow
Manually run the flow.
I received the following two emails, one for each list in the “URLs_List”.


Using this approach, we are able to execute both simple and complex tasks across multiple sites, using a single workflow.
